Paylocity setup
Paylocity connects through the unified HRIS connector. This page covers the Paylocity-side configuration you complete first. Once it's done, add the connector in Mesh by following Connect your HR system.
Paylocity has two routes, and which one you use depends on how your instance is set up:
| Route | You supply | Typical wait |
|---|---|---|
| Web services access request | Client ID, client secret, company ID | Paylocity issues credentials by email |
| Integrations marketplace | Company ID only | A few days for Paylocity to approve |
Paylocity can apply a cost to the API setup and to issuing credentials. Confirm that with your Paylocity account team before you start.
These steps reflect Axiad's current understanding of Paylocity's configuration. Because Paylocity is a third-party product, there may be variations between your experience and what this guide describes, depending on the version in use and recent updates.
If you find a significant difference, or anything that doesn't make sense, let us know through Axiad support.
Route A — Web services access request
Step 1 — Complete the access request form
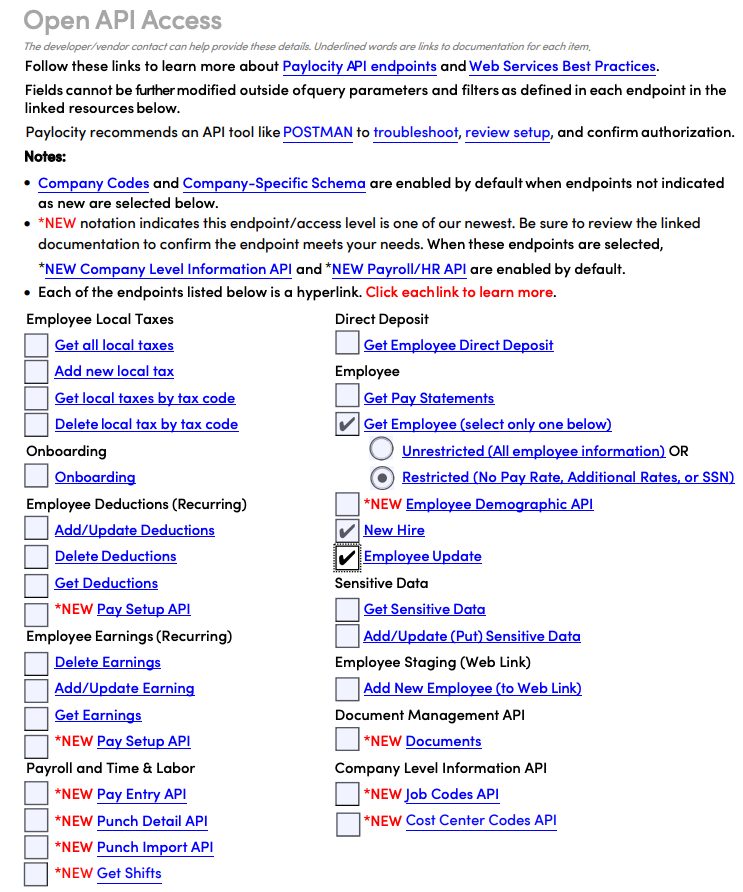
Request the Paylocity Web Services Access Request Form from your Paylocity account team, and fill it in as follows:
- Client contact information — your own company's details, typically your HR team.
- Vendor / third-party contact information — Axiad's details, as the system you are connecting to.
- Use case — state that you are connecting Paylocity to Axiad Mesh for identity data.
- Webhook push notifications — leave this section alone unless you separately intend to use Paylocity's time off webhooks.
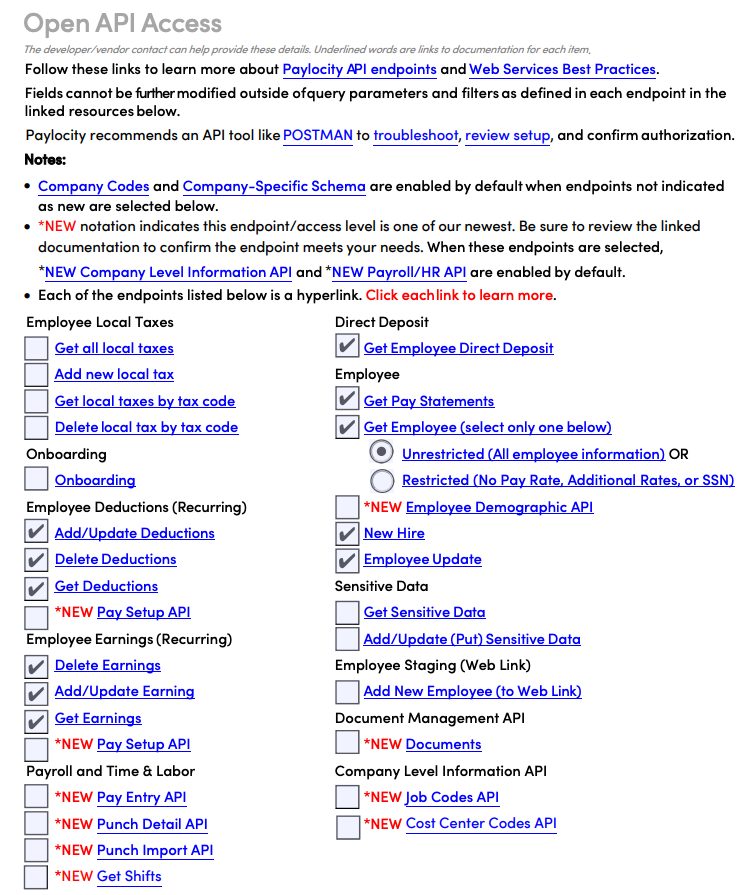
For permissions, Get Employee is required — without it the connection cannot authenticate. Select only the endpoints you actually need beyond that.
If you do want pay statements, deductions, and earnings to reach Mesh, select those as well.
Step 2 — Send the form to Paylocity
Email the completed form to Paylocity's web services team, asking for a client ID and client secret to be issued for the integration. Paylocity returns the credentials to you.
Step 3 — Connect in Mesh
Follow Connect your HR system, choose Paylocity, and supply the client ID, client secret, and your company ID.
Route B — Integrations marketplace
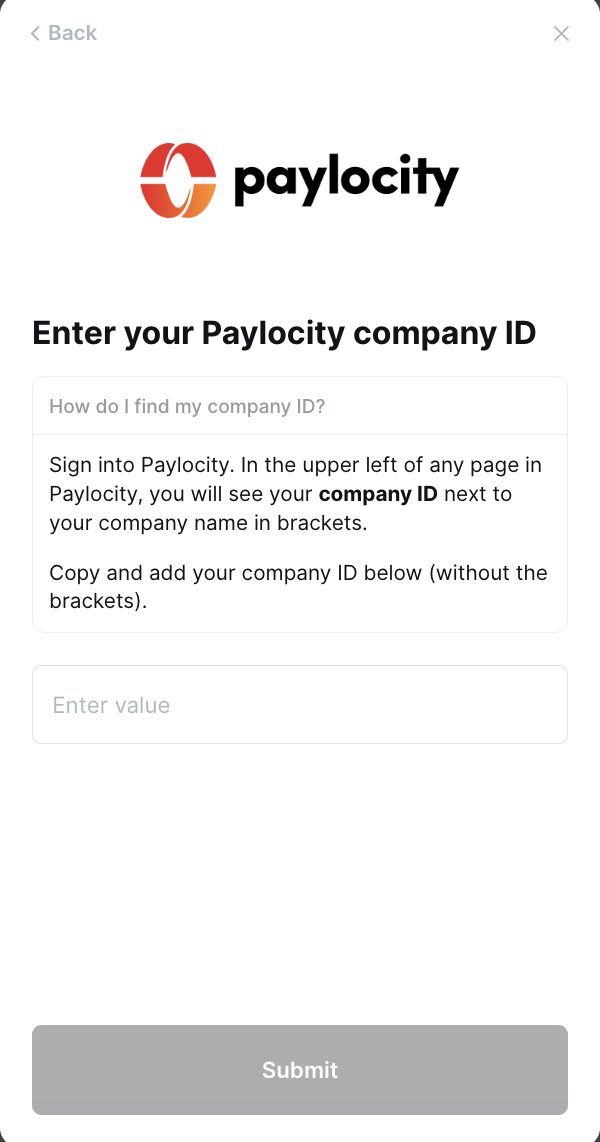
Use this route if Axiad already appears in your Paylocity marketplace as a partnered organization. You supply only your company ID.
-
Sign in to Paylocity.
-
Go to HR & Payroll → Web App → Web Services → Integrations → Browse Marketplace.
-
Find the organization you are connecting to and select Begin Integration.
-
Sign the PADE (Paylocity Automated Data Exchange) form and submit it.
Approval is not instantPaylocity reviews PADE requests manually, and confirmation can take several days. The connector cannot be completed until they approve it.
-
Once Paylocity confirms, follow Connect your HR system and enter your company ID.
After connecting
The connector appears in your connectors list with Health: Initializing while the first collection runs, then moves to Good. Access is read-only: Mesh does not write back to Paylocity.
If it doesn't come online, see Troubleshoot HR connectors.
Troubleshooting
| What you see | Likely cause | Fix |
|---|---|---|
| Authentication fails despite correct credentials | Get Employee was not granted on the access request | Ask Paylocity to add the permission, then reconnect |
| The marketplace route never completes | The PADE request is still awaiting Paylocity's approval | Check the request status with your Paylocity account team |
| Pay data is missing | Pay statements, deductions, and earnings were not requested on the form | Submit a revised access request including those permissions |