Breathe setup
Breathe connects through the unified HRIS connector. This page covers the Breathe-side configuration you complete first. Once it's done, add the connector in Mesh by following Connect your HR system.
You finish with one value: a production API key.
Before you start
You need administrator access to your company's Breathe instance, or a colleague who has it.
These steps reflect Axiad's current understanding of Breathe's configuration. Because Breathe is a third-party product, there may be variations between your experience and what this guide describes, depending on the version in use and recent updates.
If you find a significant difference, or anything that doesn't make sense, let us know through Axiad support.
Step 1 — Open API setup
-
Sign in to Breathe and select Configure at the bottom left.
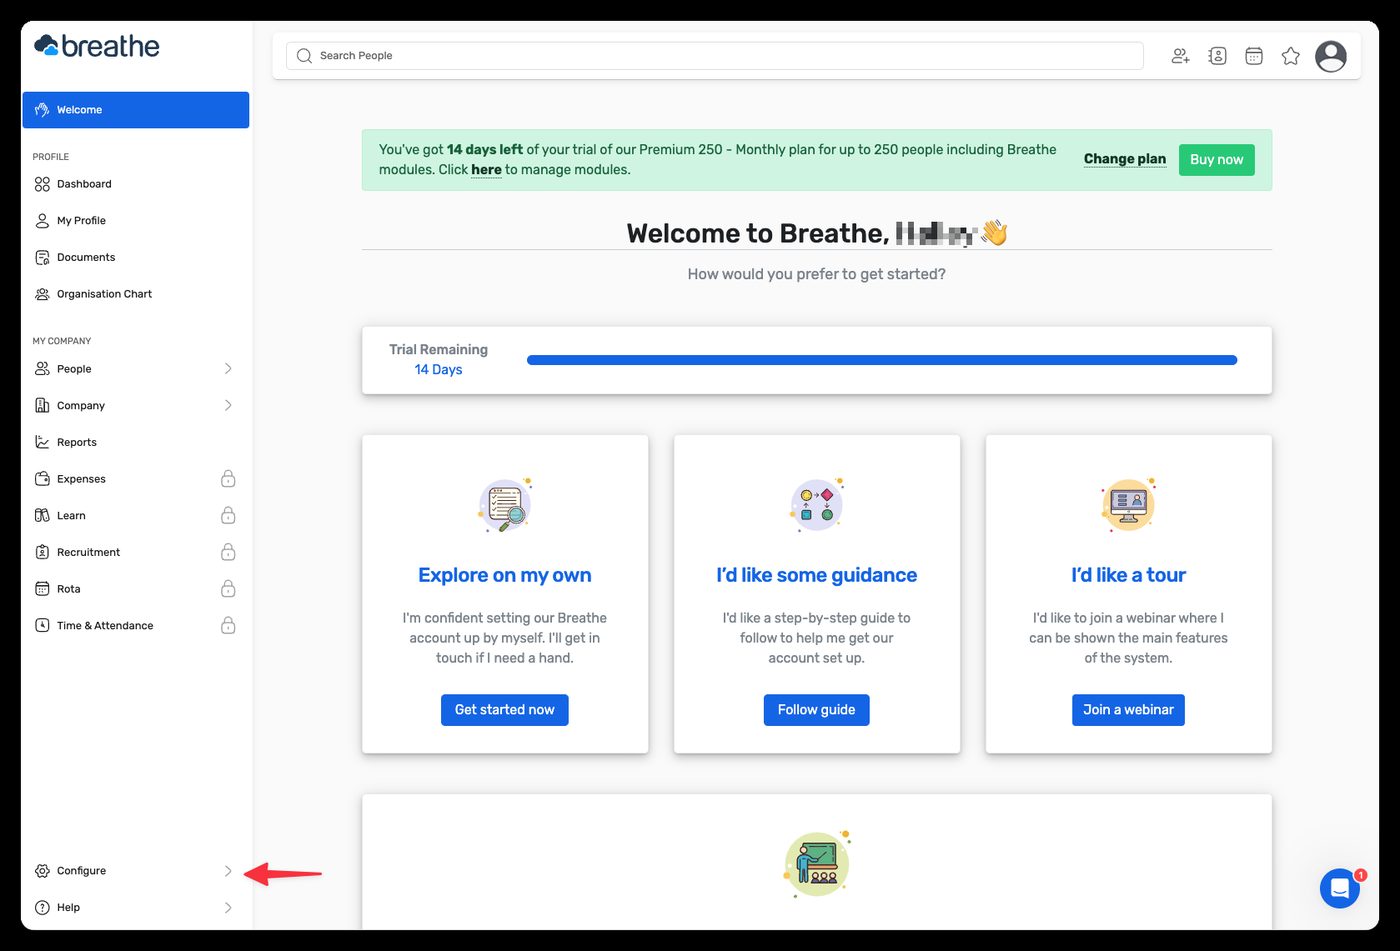
-
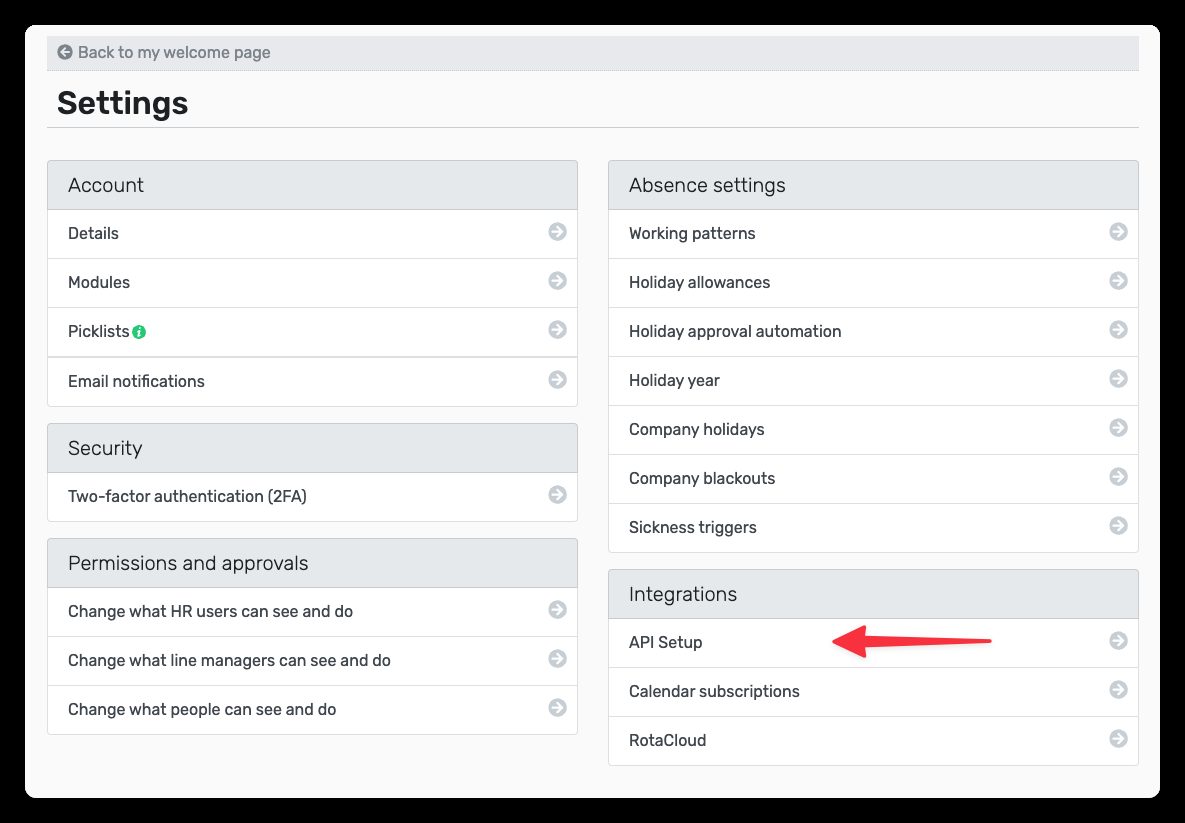
Select Settings in the panel that opens.

-
Select API Setup at the bottom right.
Step 2 — Enable the API
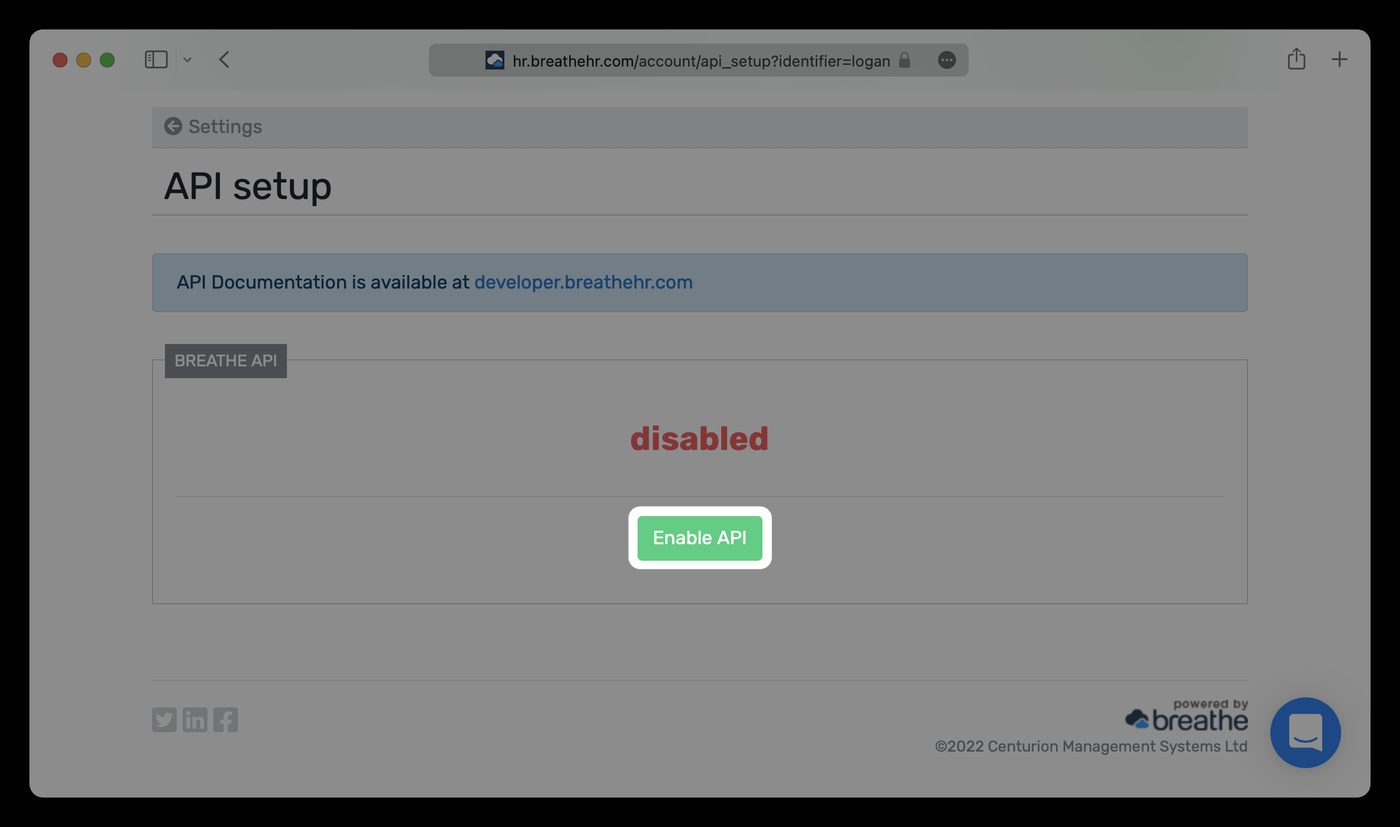
If you haven't enabled it before, select Enable API and accept the terms.
Step 3 — Copy the production API key
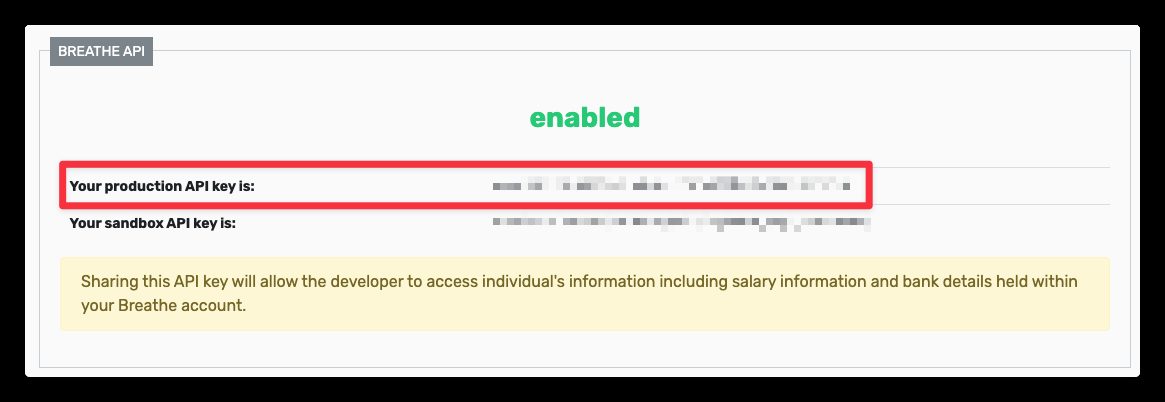
Take the production key, not a test one.
Step 4 — Connect in Mesh
Follow Connect your HR system, choose Breathe in the connection window, and paste the production API key.
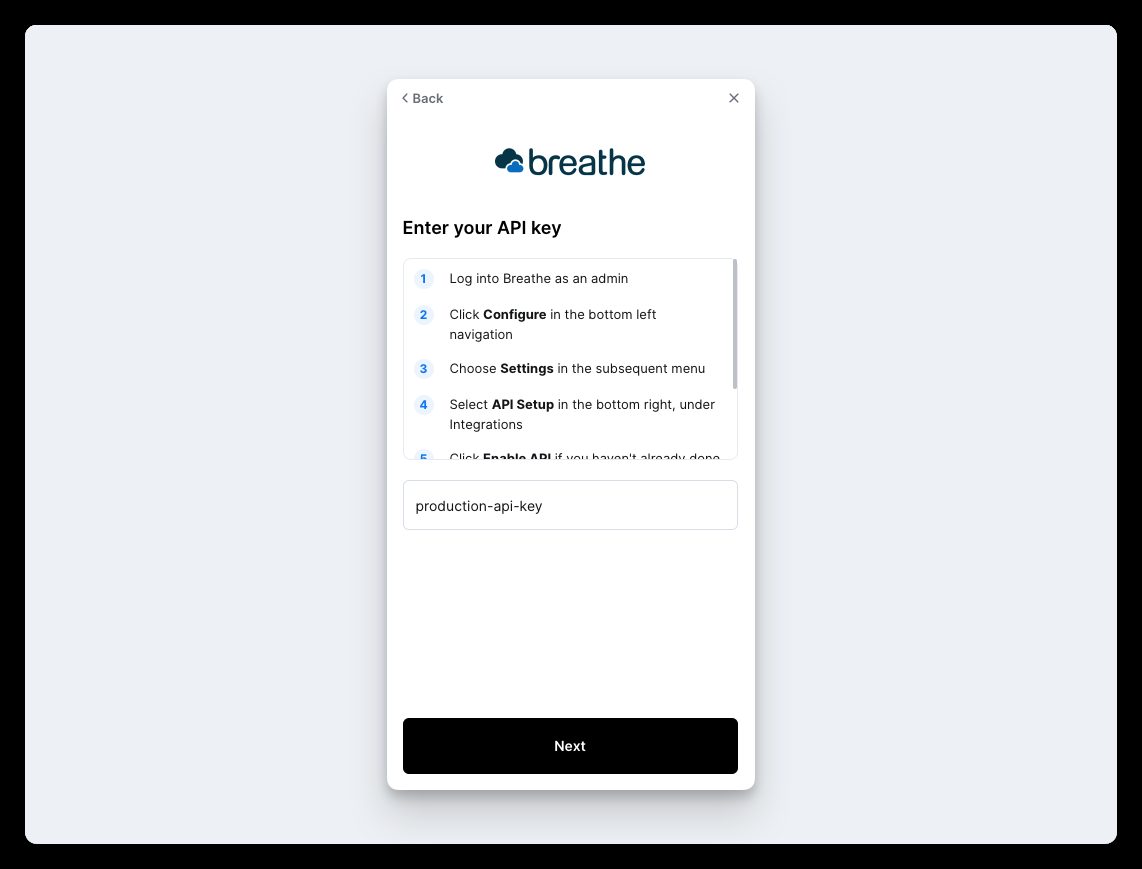
After connecting
The connector appears in your connectors list with Health: Initializing while the first collection runs, then moves to Good. Access is read-only: Mesh does not write back to Breathe.
If it doesn't come online, see Troubleshoot HR connectors.
Troubleshooting
| What you see | Likely cause | Fix |
|---|---|---|
| The API key is rejected | The API was never enabled on the account | Complete Step 2, then reconnect |
| The connector is healthy but the estate looks wrong | A test key was used instead of the production key | Copy the production key from API Setup |