Paychex setup
Paychex connects through the unified HRIS connector. This page covers the Paychex-side configuration you complete first. Once it's done, add the connector in Mesh by following Connect your HR system.
You finish with two values:
| Value | Where it comes from |
|---|---|
| API key | The integrated app you create in Paychex |
| Client secret | Shown alongside the API key when the app is saved |
Before you start
You need administrator permissions in your company's Paychex instance, or a colleague who has them.
These steps reflect Axiad's current understanding of Paychex's configuration. Because Paychex is a third-party product, there may be variations between your experience and what this guide describes, depending on the version in use and recent updates.
If you find a significant difference, or anything that doesn't make sense, let us know through Axiad support.
Step 1 — Create an integrated app
-
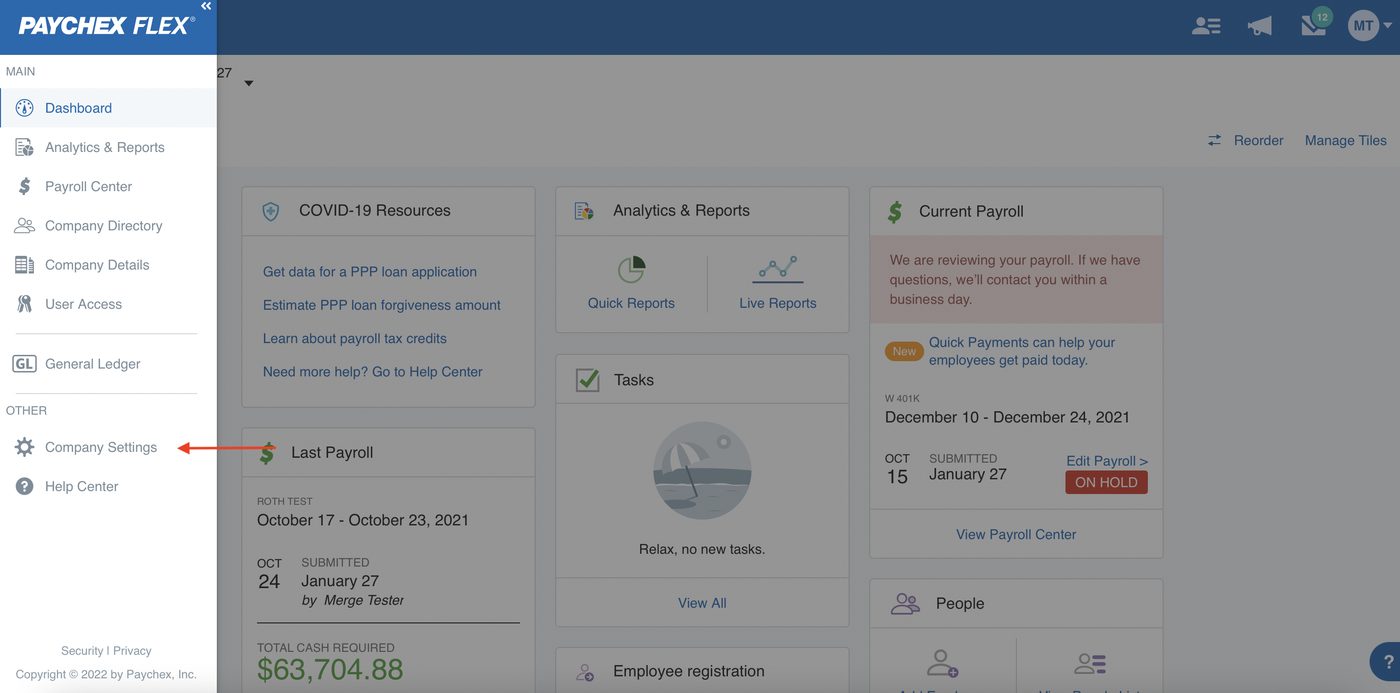
Sign in to Paychex and open Company Settings.
-
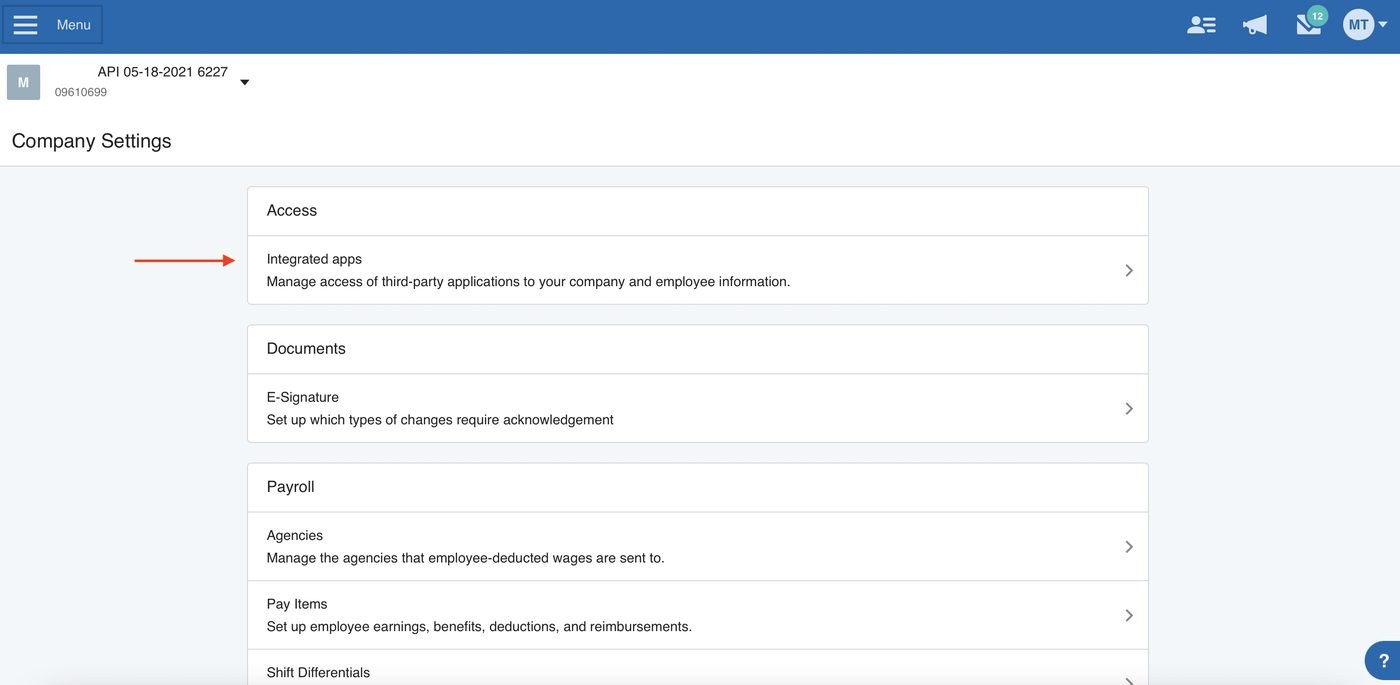
Select Integrated apps.
-
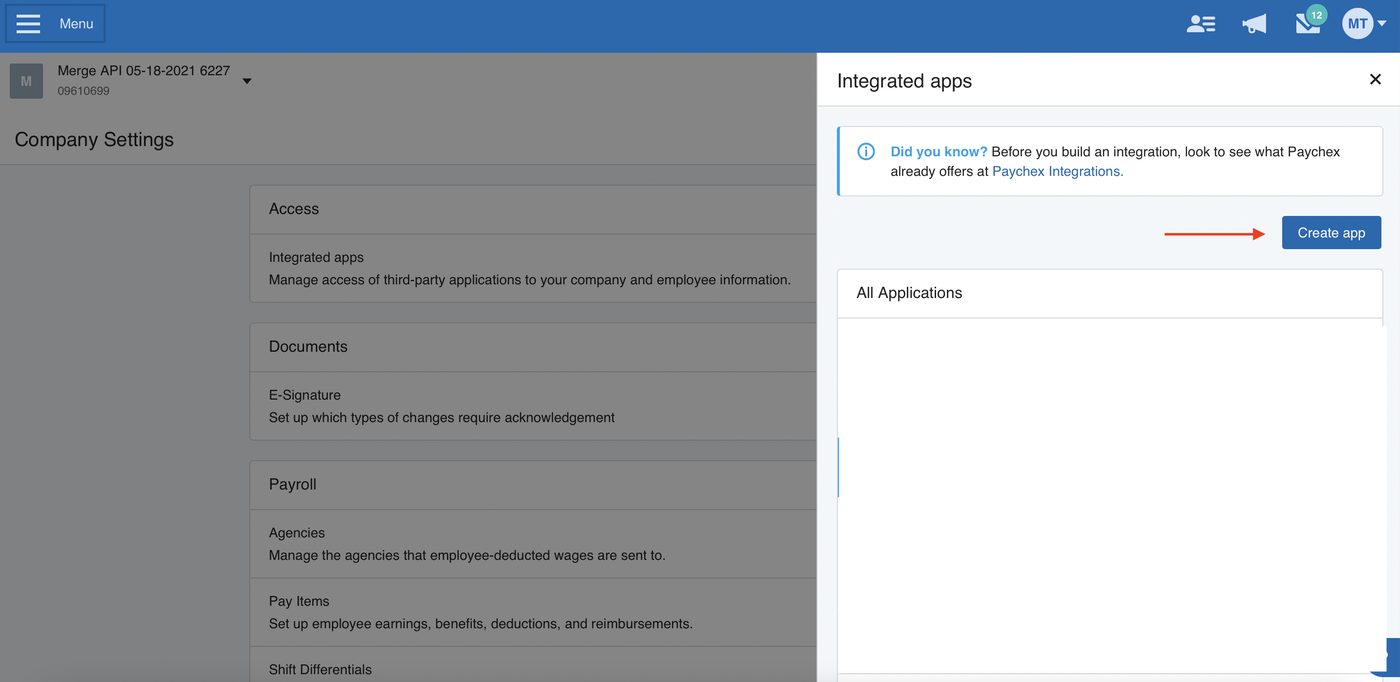
Select Create App.
-
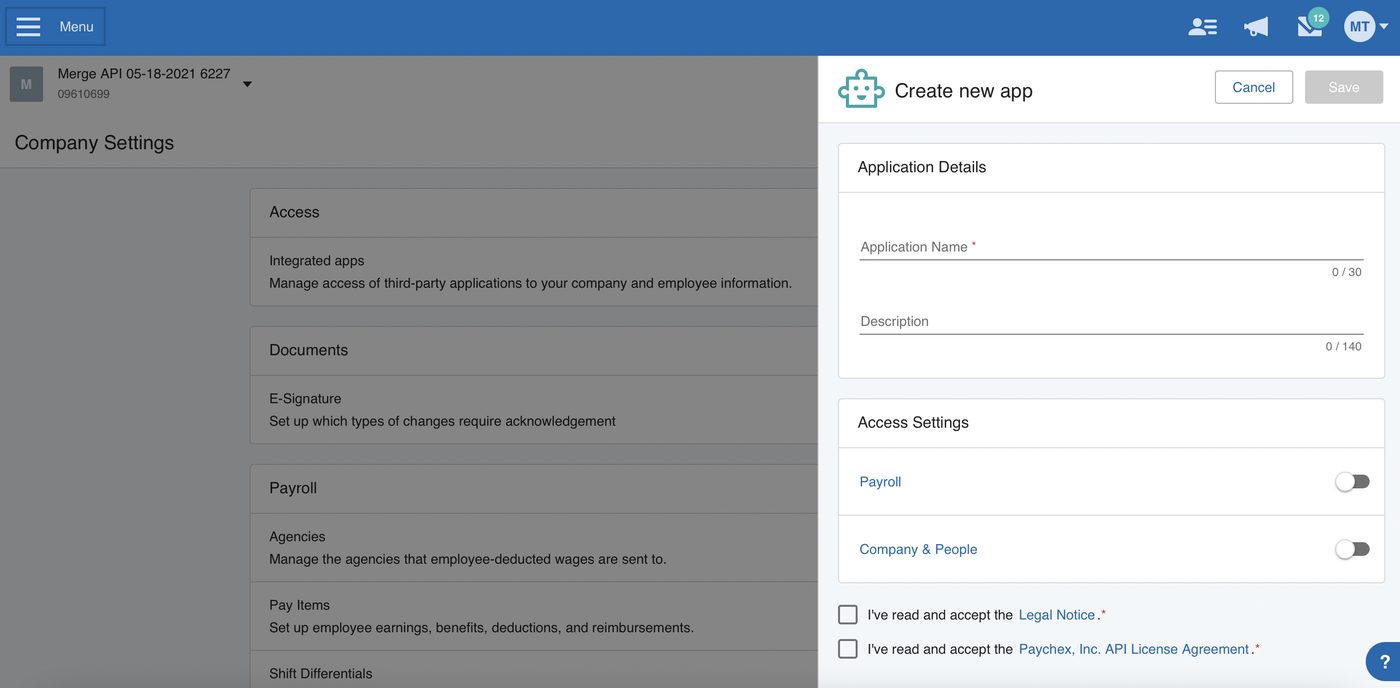
Enter an Application Name and Description. Choose something that identifies this as the Axiad Mesh connection, so a later administrator knows what it is for.
Step 2 — Grant read-only scopes
-
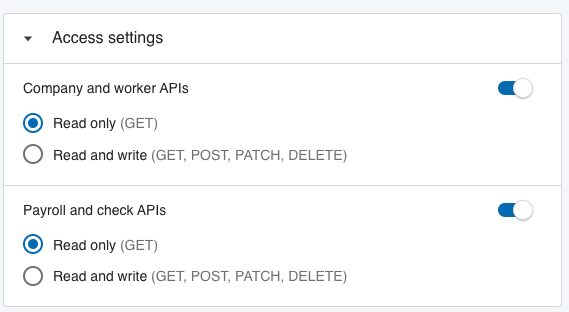
Set Company and worker APIs to Read only.
-
If you also want payroll information to reach Mesh, set Payroll and check APIs to Read only as well.
If the payroll toggle isn't thereAccess to the payroll APIs is granted by Paychex rather than self-served. If you need payroll data and the toggle isn't shown, contact your Paychex account manager and ask for the Payroll and check APIs scope to be enabled for your integrated app.
Mesh uses HR data for identity correlation and risk assessment, so company and worker access is the useful part. Add payroll only if you have a reason to — Mesh reads what the app can see, and nothing more.
-
Accept the legal notice and the Paychex API license agreement, then select Save.
-
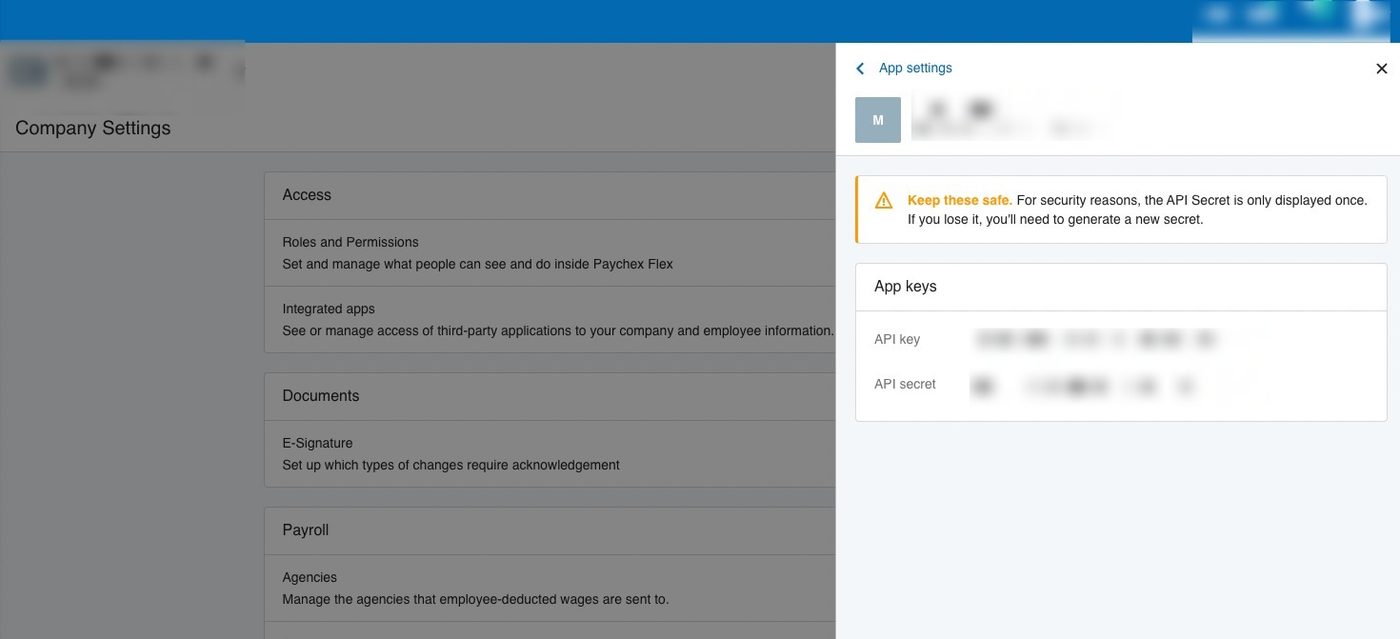
Paychex shows the API key and Client secret. Copy both.
Step 3 — Connect in Mesh
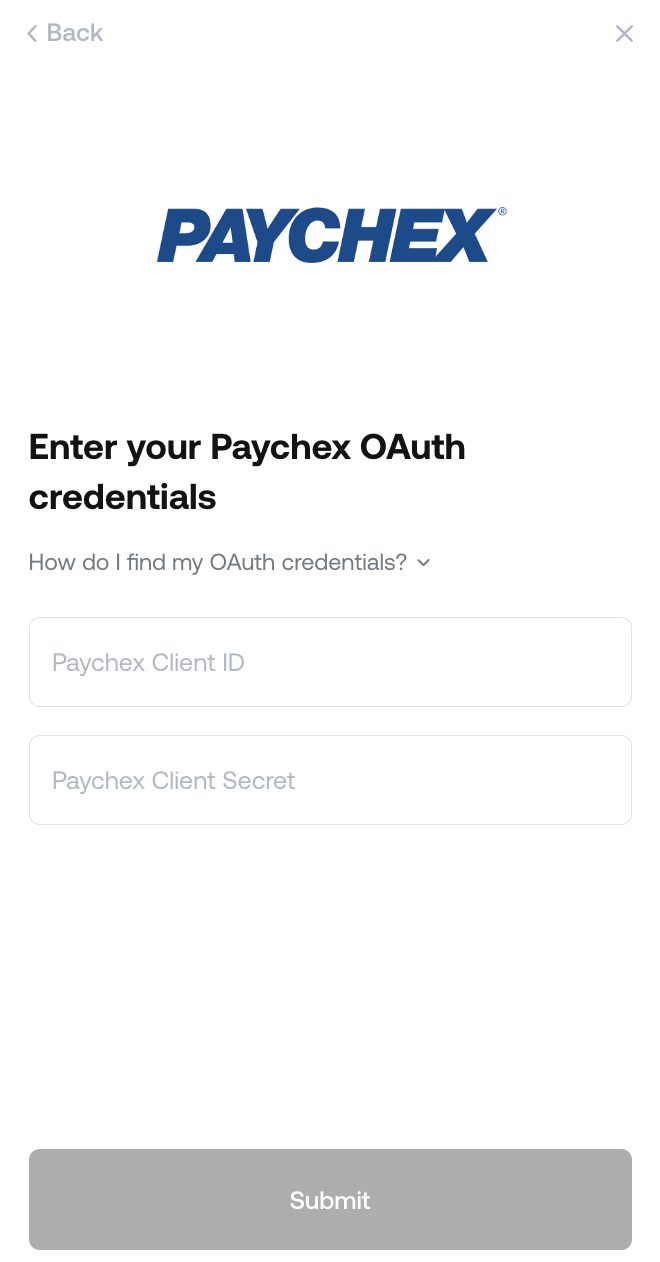
Follow Connect your HR system, choose Paychex in the connection window, and paste the API key and client secret from Step 2.
After connecting
The connector appears in your connectors list with Health: Initializing while the first collection runs, then moves to Good. Access is read-only: Mesh does not write back to Paychex.
If it doesn't come online, see Troubleshoot HR connectors.
Troubleshooting
| What you see | Likely cause | Fix |
|---|---|---|
| Authorization is rejected | The API key and client secret were copied from different apps, or one was truncated | Re-open the integrated app in Paychex and copy both values again |
| People arrive but payroll fields are empty | The app has company and worker scopes but not payroll | Ask your Paychex account manager to enable the payroll scope, then reconnect |
| You can't create an integrated app | The account lacks administrator permissions | Ask a Paychex administrator to create the app and share the credentials |