PayFit setup
PayFit connects through the unified HRIS connector. This page covers the PayFit-side configuration you complete first. Once it's done, add the connector in Mesh by following Connect your HR system.
You finish with one value: an API key.
Before you start
You must be an admin in PayFit to generate an API key.
These steps reflect Axiad's current understanding of PayFit's configuration. Because PayFit is a third-party product, there may be variations between your experience and what this guide describes, depending on the version in use and recent updates.
If you find a significant difference, or anything that doesn't make sense, let us know through Axiad support.
Step 1 — Open API access
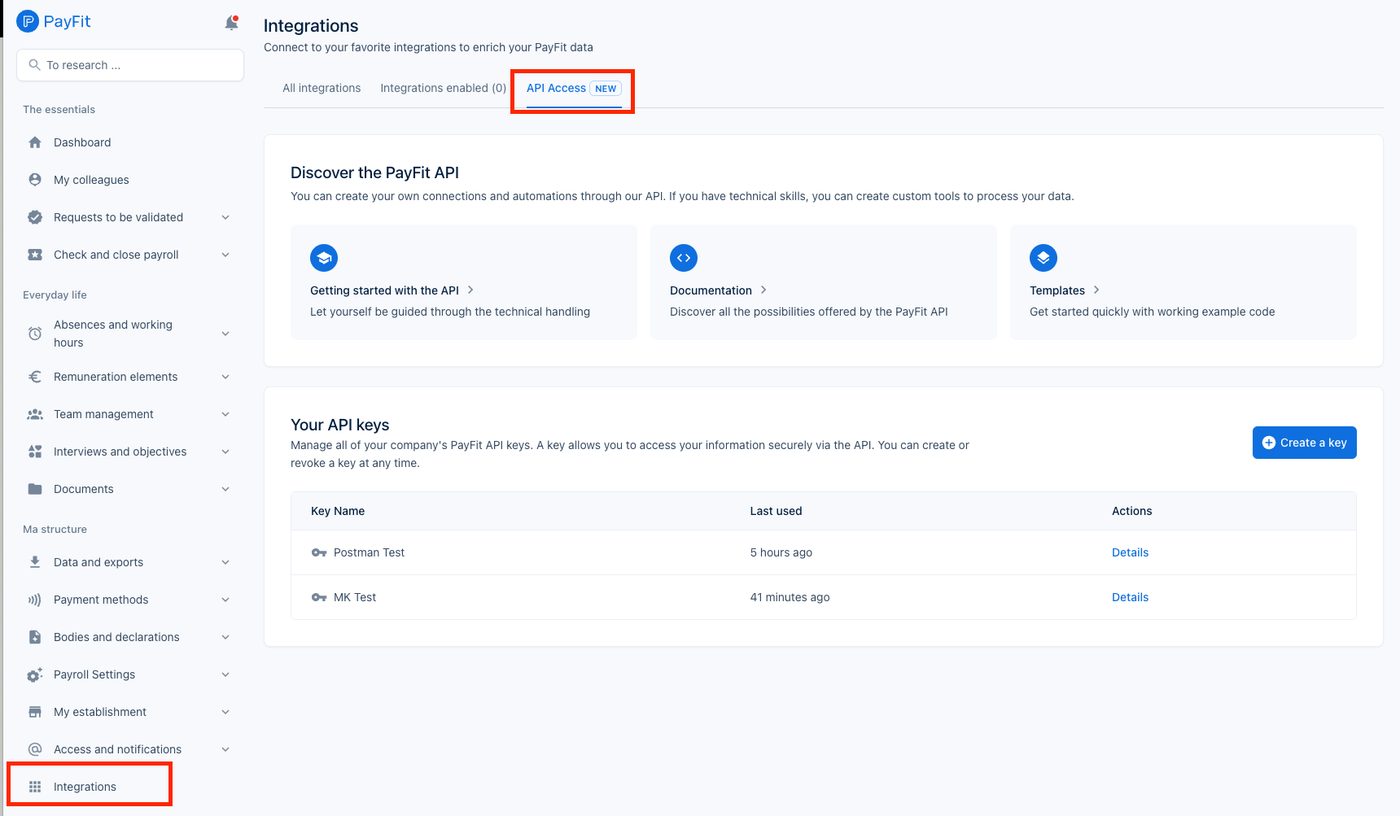
Select Integrations in the left panel, then API Access.
Step 2 — Create an API key
-
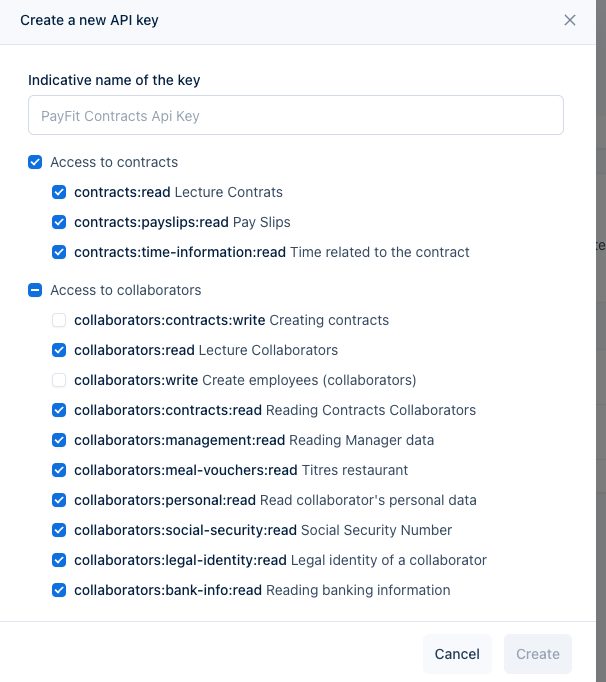
Name the key — something identifying the Axiad Mesh connection.
-
Select both read scopes:
Scope Gives Mesh Access to contracts Employment records Access to collaborators People records Both are needed. With only one, the connector authenticates and returns an incomplete picture rather than failing outright.
-
Select Create, then copy the key.
Step 3 — Connect in Mesh
Follow Connect your HR system, choose PayFit in the connection window, and paste the API key.
After connecting
The connector appears in your connectors list with Health: Initializing while the first collection runs, then moves to Good. Access is read-only: Mesh does not write back to PayFit.
If it doesn't come online, see Troubleshoot HR connectors.
Troubleshooting
| What you see | Likely cause | Fix |
|---|---|---|
| People arrive without employment detail | Only the collaborators scope was granted | Create a key with both read scopes |
| You cannot create a key | The account is not a PayFit admin | Ask a PayFit administrator to generate it |