Dayforce HCM setup
Dayforce HCM — formerly Ceridian Dayforce HCM — connects through the unified HRIS connector. This page covers the Dayforce-side configuration you complete first. Once it's done, add the connector in Mesh by following Connect your HR system.
You finish with two values:
| Value | Where it comes from |
|---|---|
| Company ID | Your Dayforce instance |
| Web services credentials | A user you configure for the integration |
Before you start
The role you configure for this integration must be the user's default role. To set it, go to System Admin → User, open the user, and select Is Default against the role you're about to configure.
If you skip this, the permissions below are granted to a role Dayforce doesn't apply, and the connection fails in a way that looks like a credential problem.
These steps reflect Axiad's current understanding of Dayforce's configuration. Because Dayforce is a third-party product, there may be variations between your experience and what this guide describes, depending on the version in use and recent updates.
If you find a significant difference, or anything that doesn't make sense, let us know through Axiad support.
Step 1 — Grant feature access
-
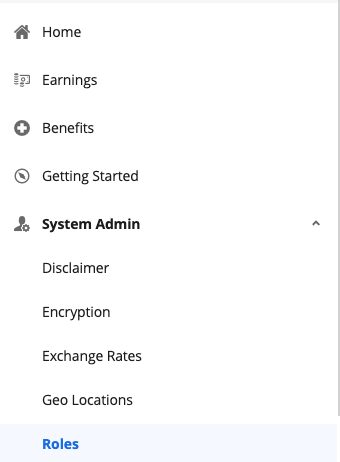
From the menu at the top left, go to System Admin → Roles.
-
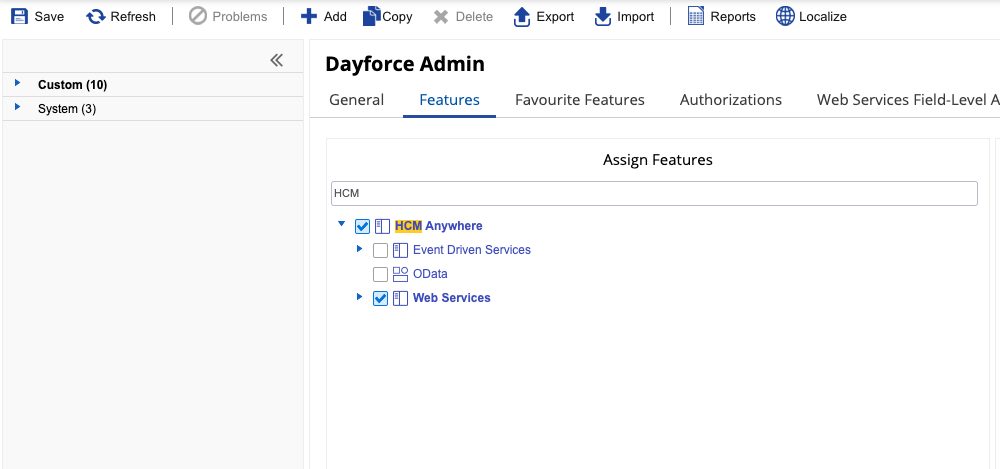
Open Features and make sure HCM Anywhere and Web Services are both checked.
-
Expand Web Services and check Read Data.
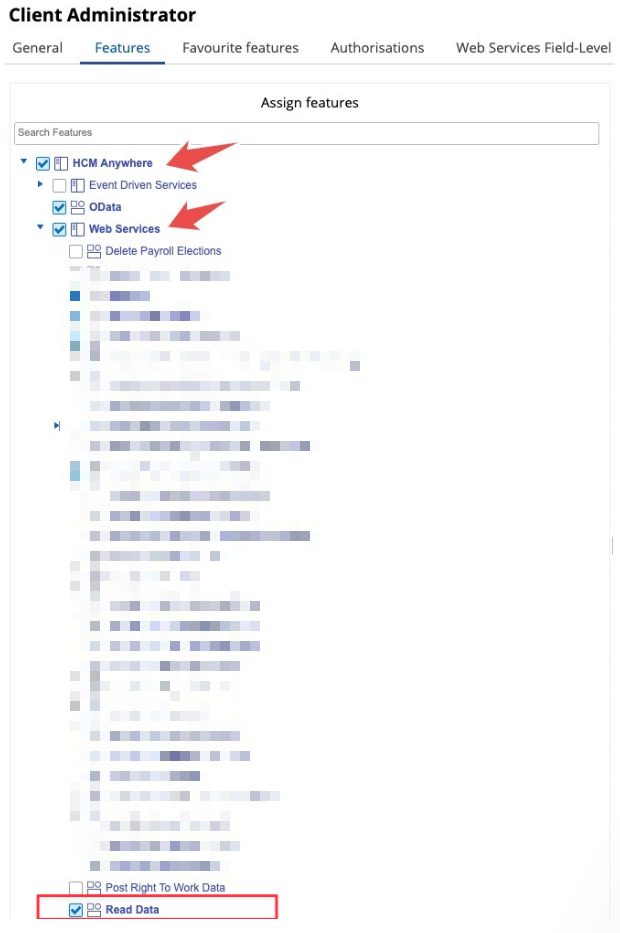
Mesh only reads, so Read Data is all it needs. The write options are not required and are best left unchecked.
Step 2 — Grant read authorizations
Go to Authorizations and set Can Read on the employee data you want Mesh to see. For identity correlation and risk assessment, the useful ones are:
- Employee Key Information
- Employee Personal Information
- Employee Contact Information
- Employee Status Information
- Employee Work Assignment
- Employee Profile — Security Settings — Role
- Employee Properties, for custom fields
Add the financial and pay authorizations only if you have a reason to. Mesh reads what the role can see, and nothing more.
Step 3 — Connect in Mesh
Follow Connect your HR system, choose Dayforce HCM in the connection window, and supply your company ID and the web services credentials for the user whose default role you configured.
After connecting
The connector appears in your connectors list with Health: Initializing while the first collection runs, then moves to Good. Access is read-only: Mesh does not write back to Dayforce.
If it doesn't come online, see Troubleshoot HR connectors.
Troubleshooting
| What you see | Likely cause | Fix |
|---|---|---|
| Authorization is rejected although the credentials are correct | The configured role is not the user's default role | Set Is Default on that role under System Admin → User, then reconnect |
| The connector authorizes but returns no employees | Read Data is not checked under the Web Services feature | Check it in System Admin → Roles → Features, then re-run the collection |
| Some employee fields are missing | The matching authorization is not set to Can Read | Add the authorization in Step 2 and re-run the collection |