Okta identity provider integration
You can integrate your Okta identity provider (IdP) with Axiad Mesh to make sure that your users sign in to the portal securely.
The integration requires updates on both Okta and Axiad Mesh.
This guide covers using Okta to sign in to the Axiad Mesh portal. To collect identity data from Okta for correlation and risk analysis, see the Okta connector reference instead.
Okta IdP configuration steps
These steps are Axiad's current understanding of the configuration. Because Okta is a third-party product, there may be slight variations between your experience and what this guide describes. We work hard to keep things as up to date as possible, but depending on the versions in use, the latest updates, and so on, there may be some mismatches.
If you find any blatant differences or anything that doesn't make sense, contact Axiad support with feedback on this article.
-
Sign in to your Okta administrative portal and go to Applications under the Applications menu.
-
Select the Create App Integration button.
-
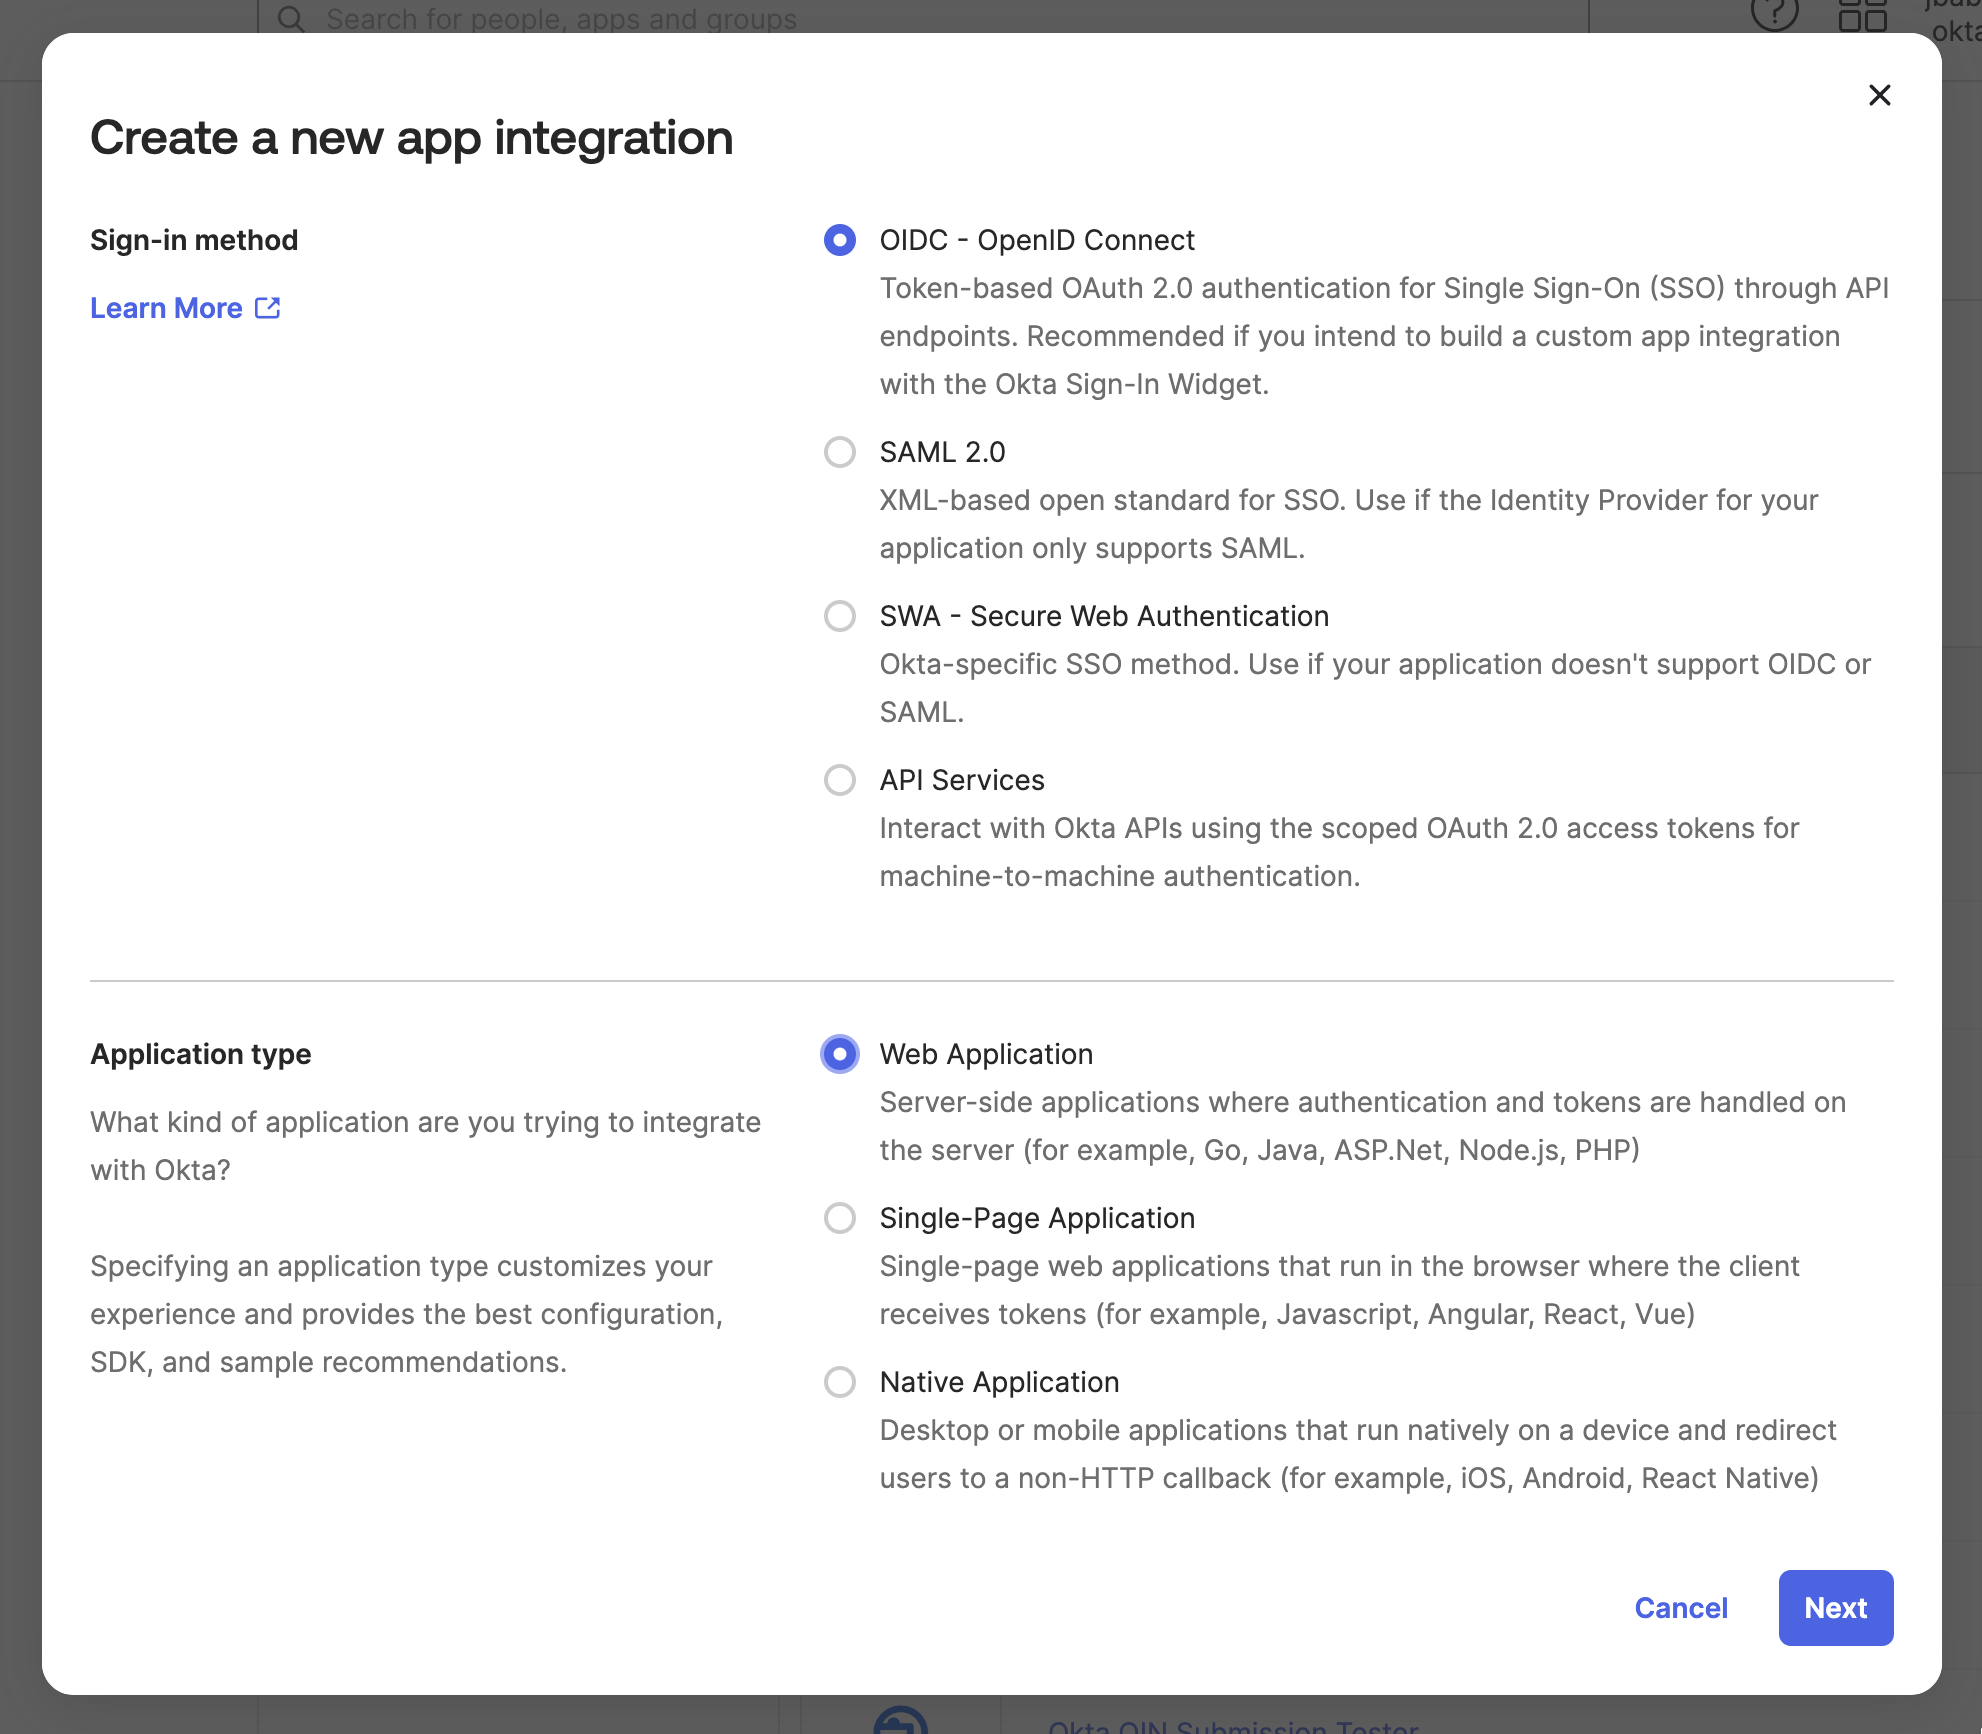
On the Create a new app integration page, select OIDC - OpenID Connect as the Sign-in method.
-
Select Web Application as the Application Type.
-
Under General Settings on the New Web App Integration page, set the App integration name to a friendly name, for example Axiad Mesh.
-
Enable Client Credentials for the Grant type option.
-
Add the Sign-in redirect URI:
- The format for this is
https://mesh.axiad.io/oauth2/callback?domain=<domain>. - Replace
<domain>with the name that matches the UPN domain component — for example, acme.com for users such as johnsmith@acme.com.- Copy this domain value — you enter it in the Domain field during the Axiad Mesh configuration steps.
Multiple domain supportYou can configure multiple IdP connections in Axiad Mesh to handle multiple domains.
- The format for this is
-
Under Assignments, choose how users get access to Axiad Mesh. There are two supported models, and they are mutually exclusive.
Model Controlled access setting Federation Broker Mode Effect Assign groups (recommended) Limit access to selected groups, then specify the groups Leave disabled Only members of the groups you assign can sign in to Mesh Federation Broker Mode Allow everyone in your organization to access Enable Enable immediate access with Federation Broker Mode Assignment is bypassed, so anyone in your Okta org can sign in to Mesh Axiad recommends the first model, because it limits sign-in to the users you choose. Choose Federation Broker Mode when you don't want to manage app assignments in Okta, and you accept that everyone in the org can reach the portal.
Federation Broker Mode widens accessFederation Broker Mode removes the per-user assignment requirement altogether. Signing in is then possible for every user in your Okta org. Whether a user becomes a Mesh administrator is decided separately, by the group claim you configure below.
-
Select Save.
-
Copy the following information from the Okta setup to complete the configuration in Axiad Mesh:
- Okta Tenant ID
- Client ID
- Client Secret
noteThe Okta Tenant ID is the value without the
okta-prefix, and it shouldn't include the-adminsuffix.
Create the Mesh administrator group
Axiad Mesh decides who is an administrator from a group claim that Okta sends in the ID token. Create the group in Okta first.
- In the Okta Admin Console, go to Directory > Groups and select Add group.
- Give the group a name that identifies its purpose, for example
Axiad-Mesh-Admins, and then select Save. - Add the users who should be Axiad Mesh administrators to the group.
- Note the group name exactly as you typed it. You enter the same value in the Admin groups field during the Axiad Mesh configuration steps.
Adding a user to this group makes them a Mesh administrator. It does not grant them access to the application. If you chose Limit access to selected groups in step 8, the user must also be in one of the assigned groups, or they can't sign in at all.
Configure the group claim
Without this step, Okta doesn't send group information to Axiad Mesh, so no user is recognized as an administrator even when the group exists and the Mesh configuration is correct.
- In Applications > Applications, open the application you created.
- Go to the Sign On tab.
- Scroll to the Token claims section and expand Show legacy configuration at the bottom of the section.
- Select Edit.
- Set Groups claim type to Filter.
- Set the Groups claim filter fields to:
- Name:
groups - Condition: equal
- Value: the name of the administrator group you created, for example
Axiad-Mesh-Admins
- Name:
- Select Save.
If administrators sign in but land without administrative rights, this claim is
the first thing to re-check. Confirm that the claim name is groups and that
the filter value matches the Okta group name character for character.
Axiad Mesh configuration steps
You can integrate your Okta IdP with Axiad in the initial onboarding process as the primary IdP, or as a secondary IdP after you configured another IdP as the primary IdP.
For more information about the initial onboarding process, see Complete your Marketplace onboarding.
Initial onboarding configuration
If you're adding Okta as your primary IdP during your initial onboarding, complete the following steps.
-
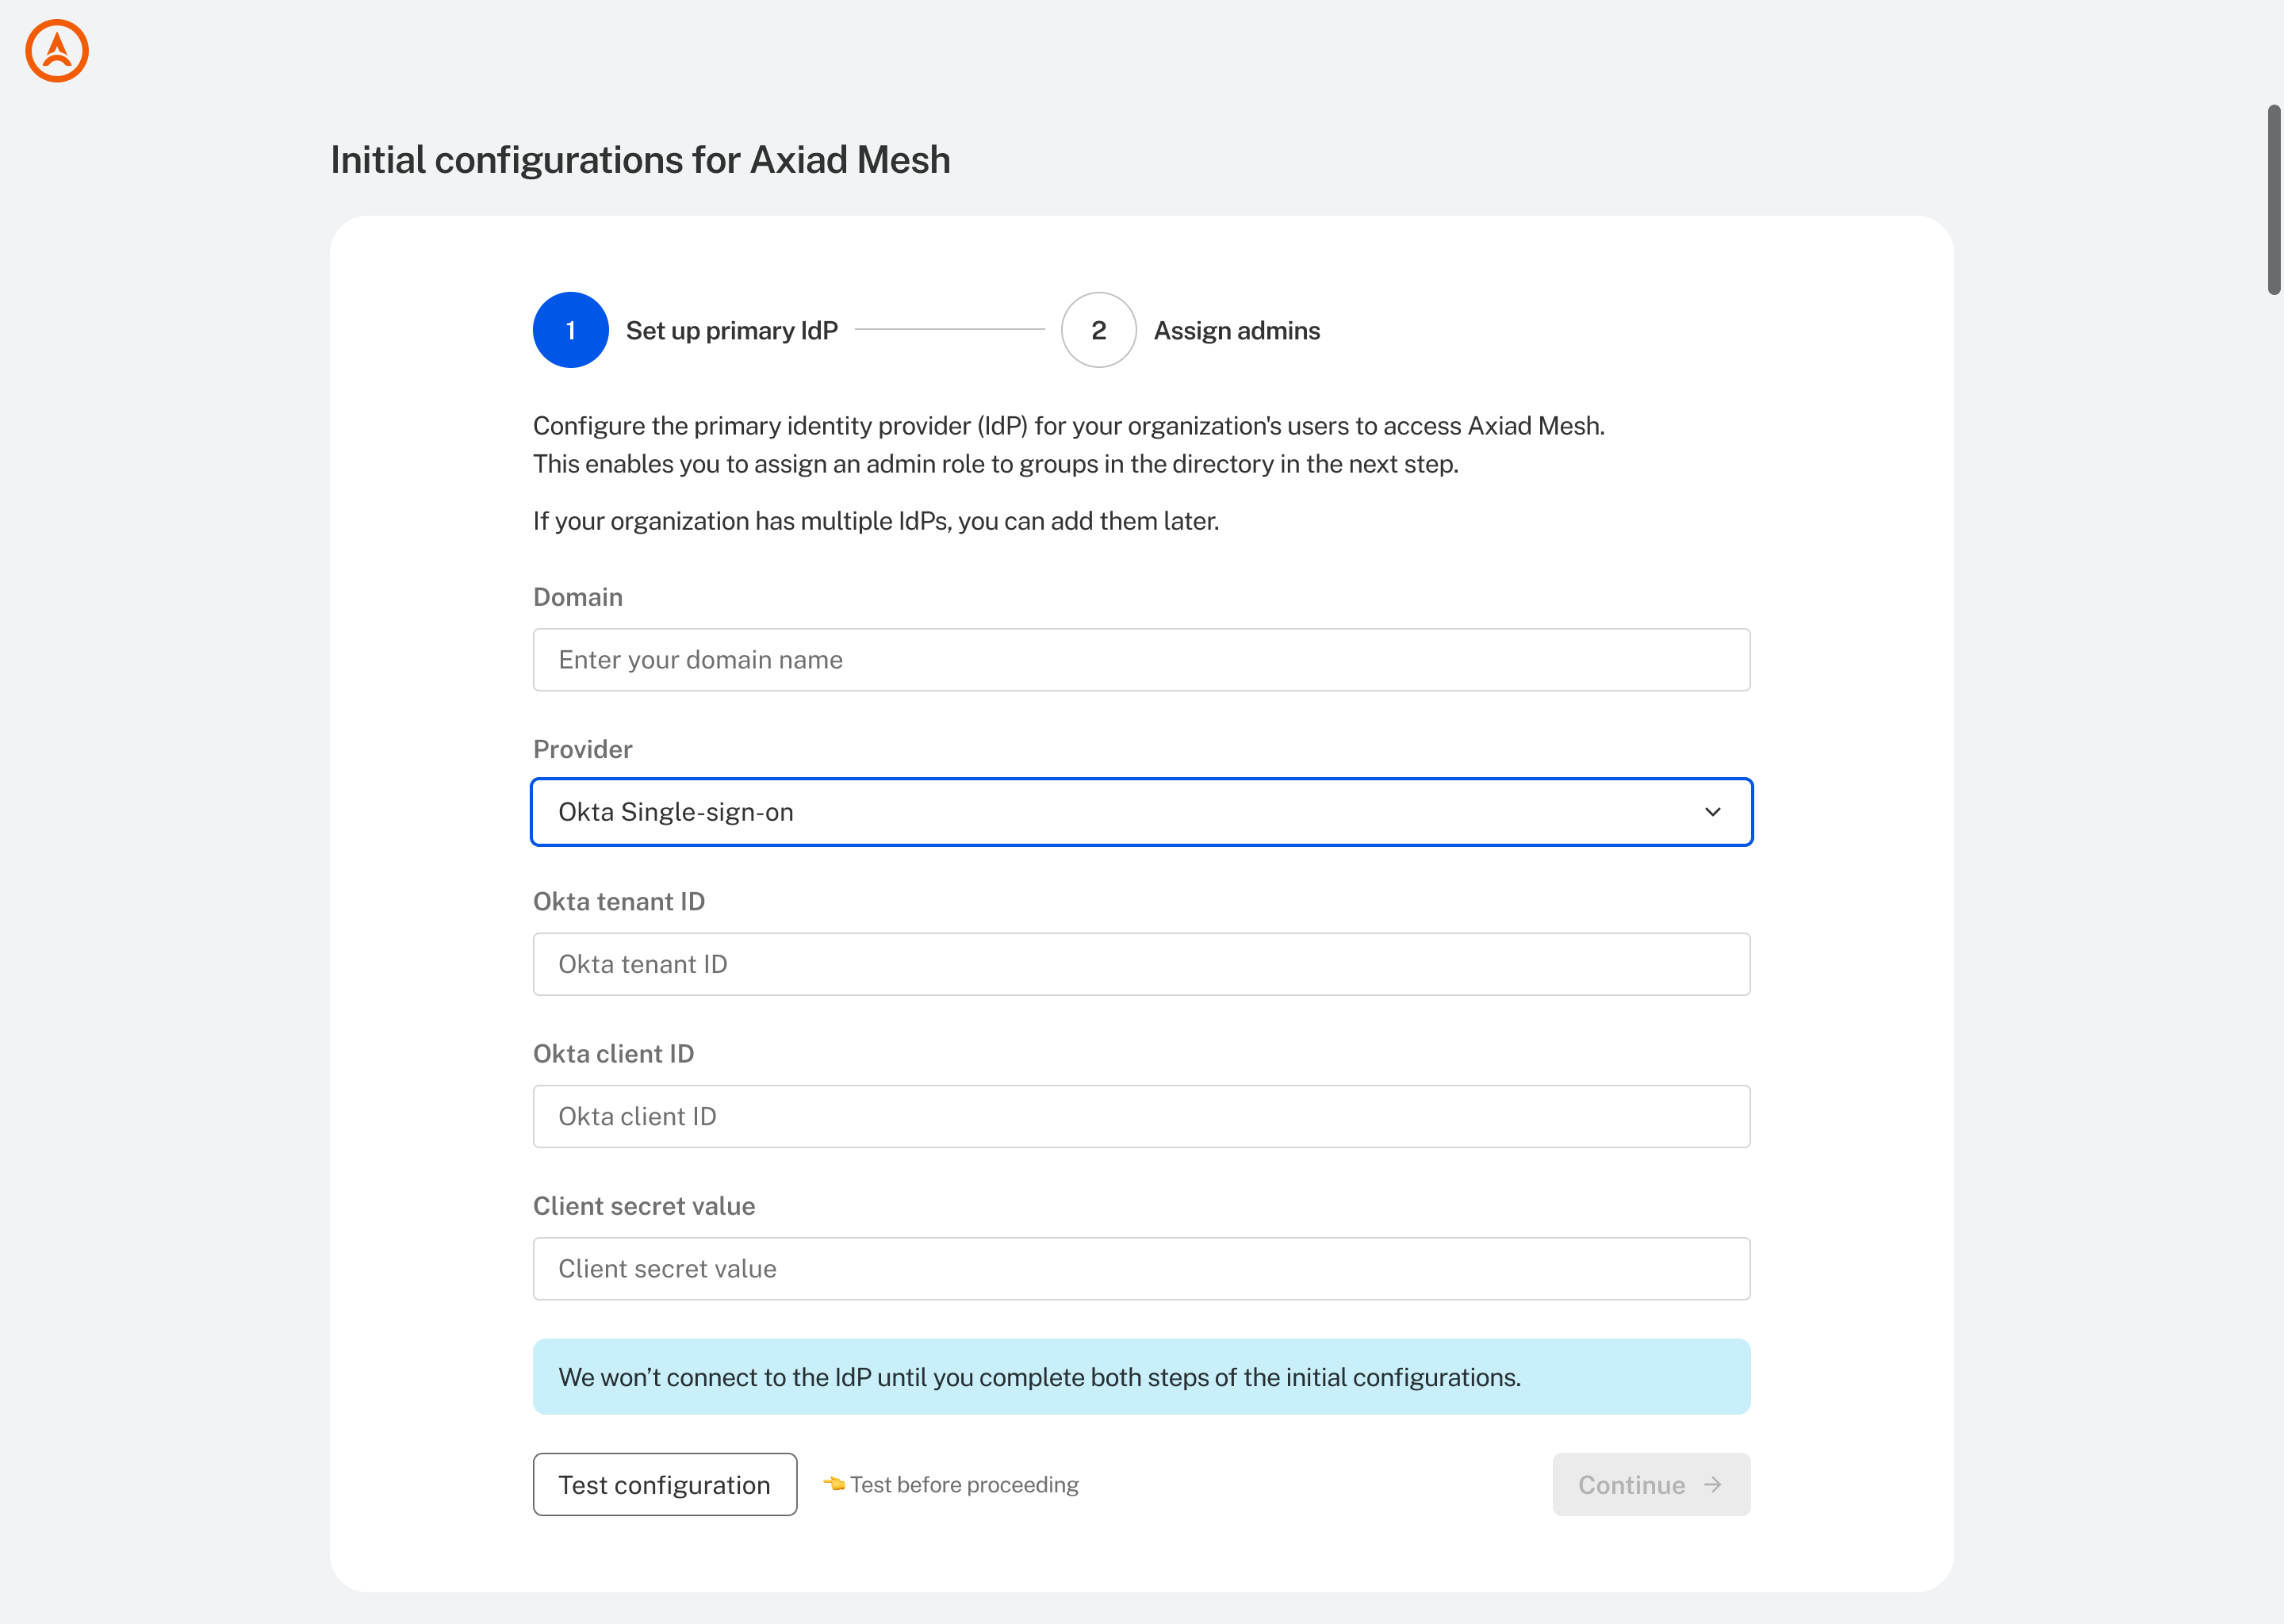
After you select the access link in the Axiad Mesh welcome email, you're prompted to set up your primary IdP.
-
Set the Domain to the domain value included in the Okta redirect URI (step 7 of the Okta configuration).
-
Select Okta Single-sign-on from the Provider list.
-
Fill in the fields with the values you copied from the Okta configuration (step 10).
-
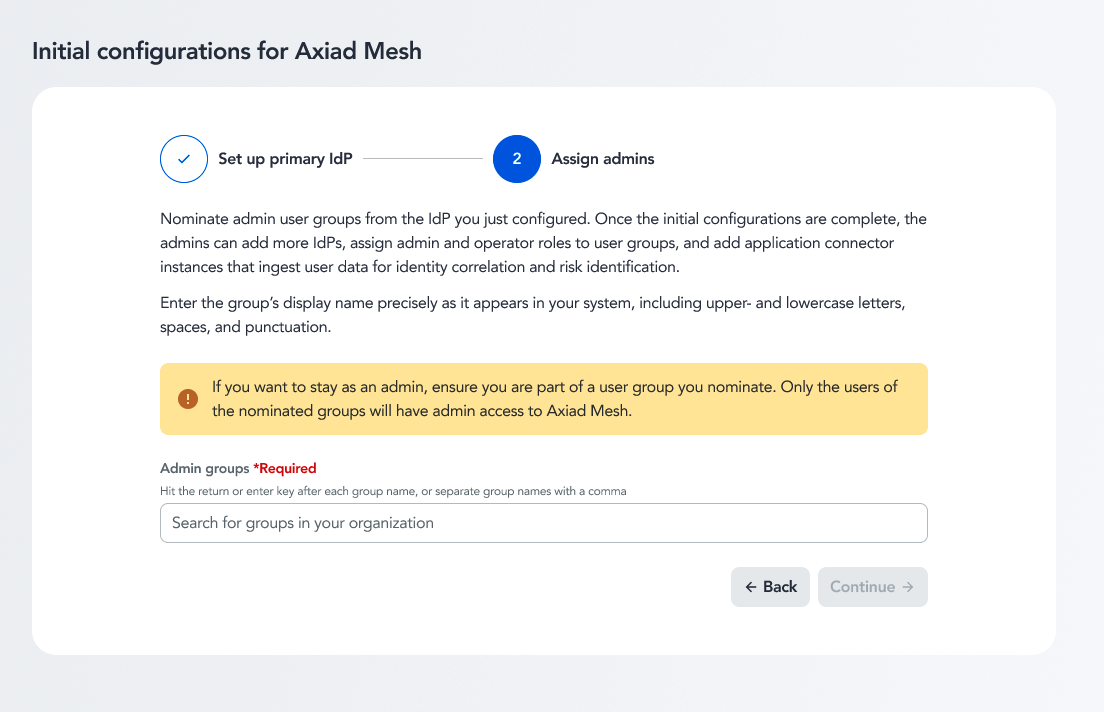
On the next screen, set the Admin groups based on which users you want to be Axiad Mesh admins when they sign in with Okta.
Okta group limitationsOnly users that are in the groups you selected in step 8 of the Okta configuration can access Axiad Mesh. For any groups you add here, be sure that their members are included in any group limitations made in Okta.
-
Select Continue, and you're signed in to the Axiad Mesh portal for the first time.
Secondary IdP configuration
If you already have your initial IdP connected and need to add a new one, or you need to replace the existing one, you can connect your Okta IdP from the Axiad Mesh administrative portal.
-
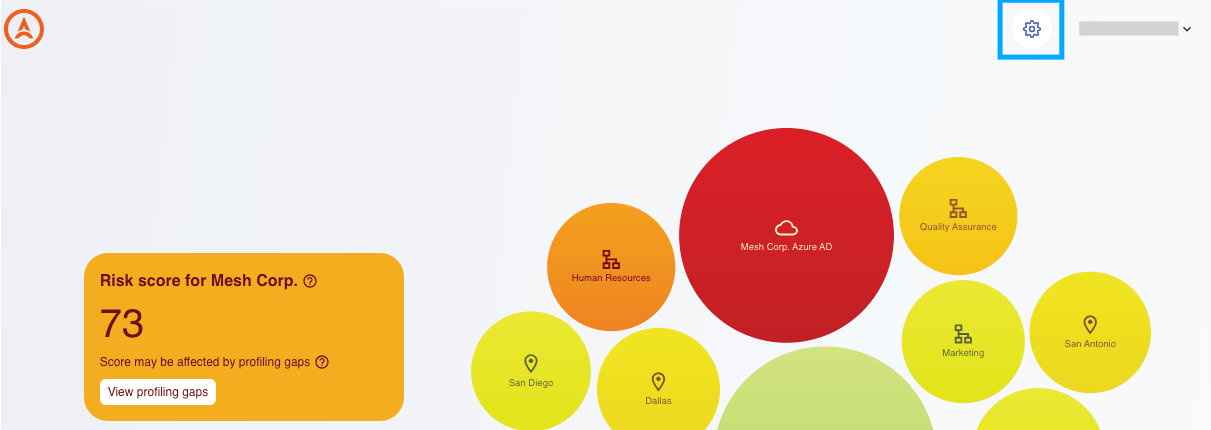
From the home page, select the gear icon to open the Settings page.
-
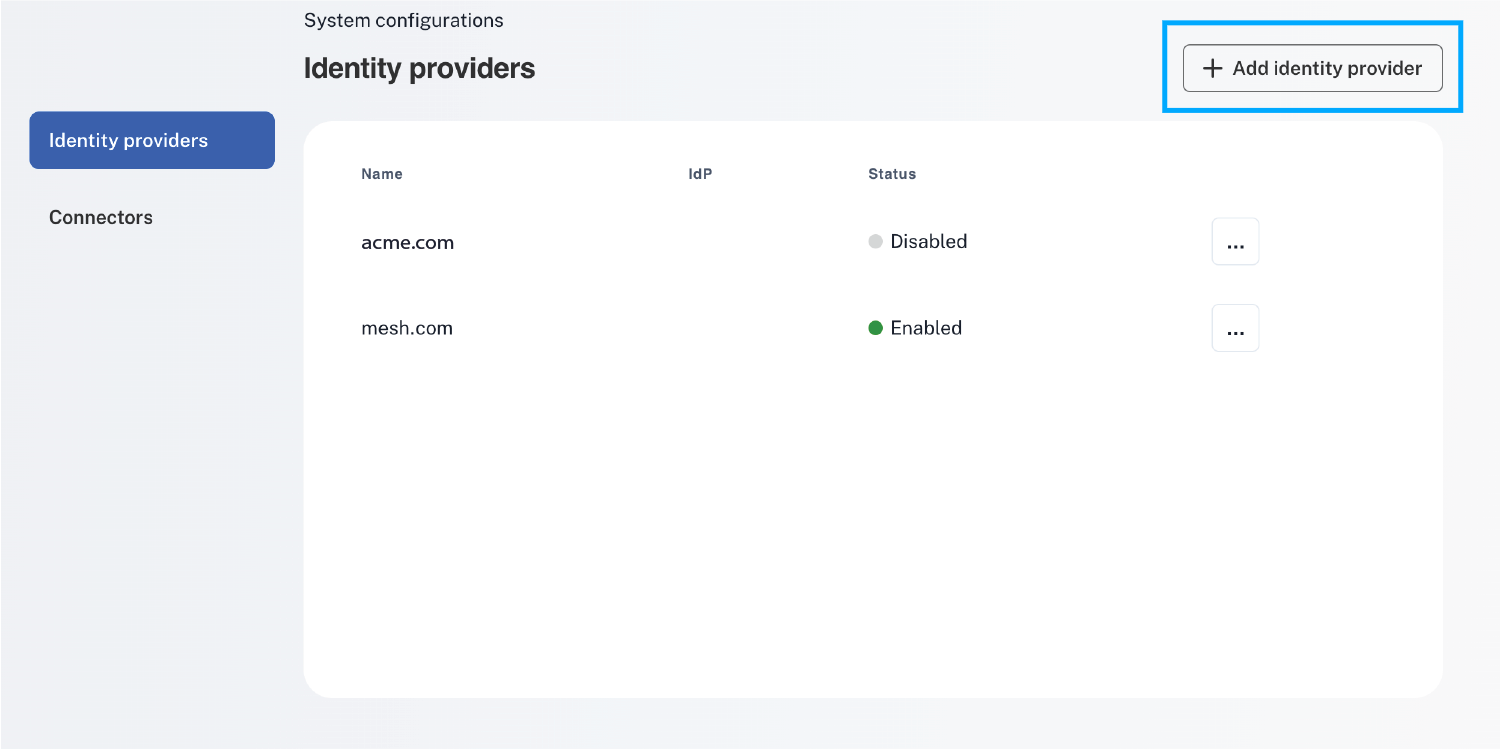
Select Identity providers from the left menu, and then select + Add identity provider.
-
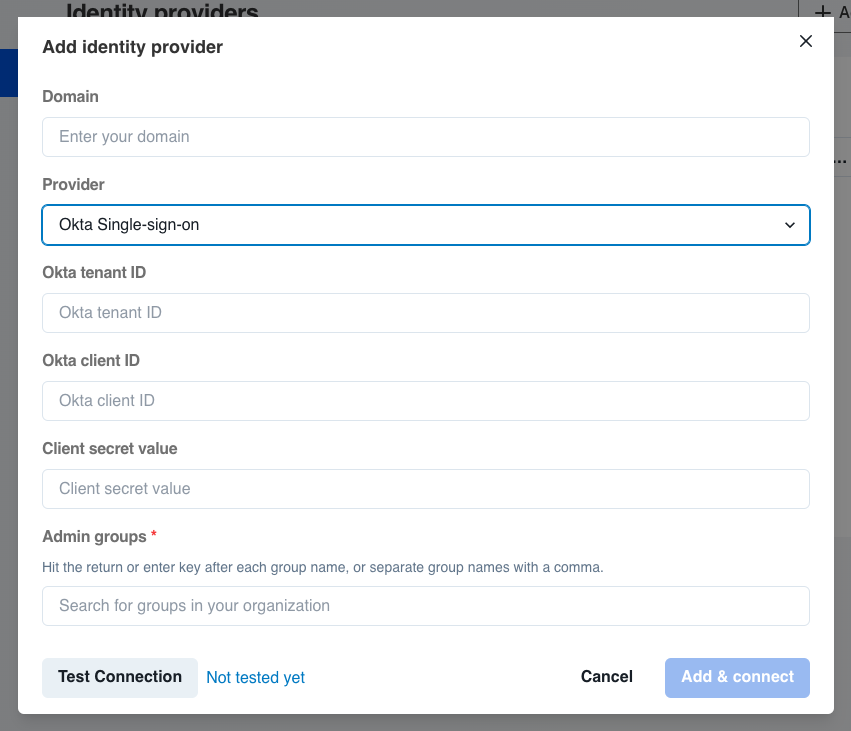
On the Add identity provider page, set the Domain to the domain value included in the Okta redirect URI (step 7 of the Okta configuration).
-
Select Okta Single-sign-on from the Provider list.
-
Fill in the fields with the values you copied from the Okta configuration (step 10).
-
Set the Admin groups based on which users you want to be Axiad Mesh admins when they sign in with Okta.
Okta group limitationsOnly users that are in the groups you selected in step 8 of the Okta configuration can access Axiad Mesh. For any groups you add here, be sure that their members are included in any group limitations made in Okta.
-
After the fields are filled out, select Test Connection.
-
After a successful test, select Add & Connect.
-
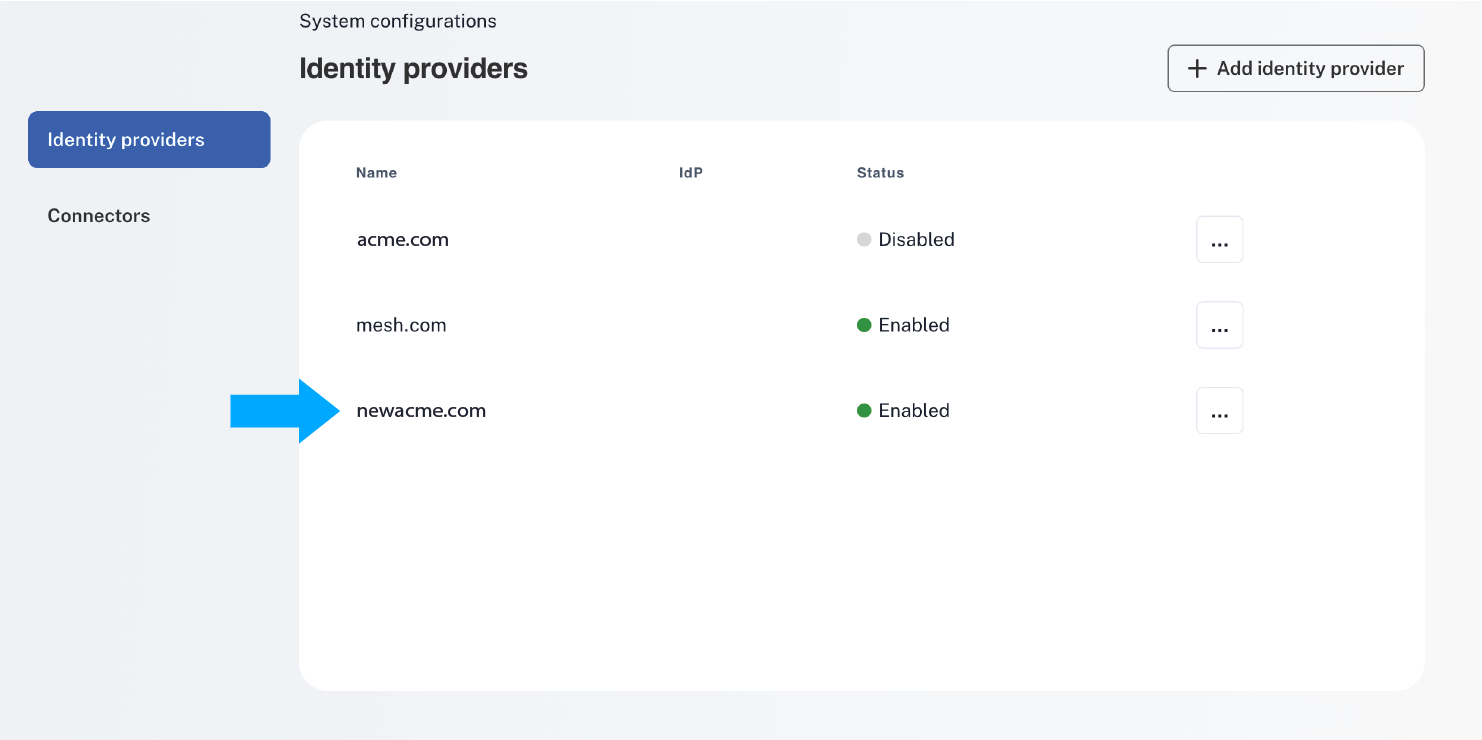
When the setup is complete, the new IdP appears on the Identity providers page.