Set up ServiceNow CMDB
Nine steps. Have your instance URL and credential ready before you start — see what you need.
These steps are for the classic Settings page. If you're in the new Axiad Mesh experience, ServiceNow CMDB shows a Coming soon label and can't be selected. Open your profile menu, select Switch to Classic View, then follow the steps below.
Step 1 — Open Connectors
- Select Settings → Connectors.
- Select Add connector.

Step 2 — Choose Manual setup
Mesh offers three ways to add a connector. Choose Manual setup.
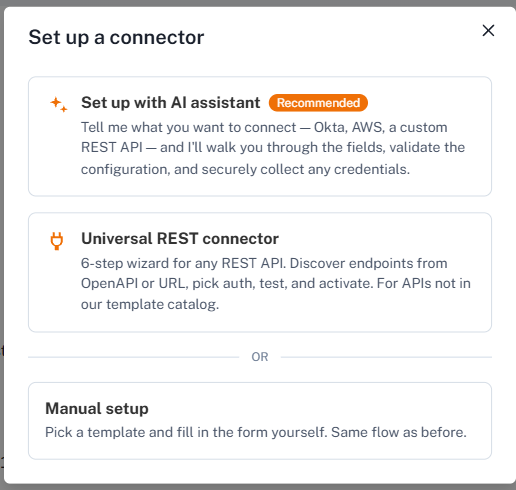
Step 3 — Name it and pick the provider
Enter a Name. This is only a label — it appears in your connector list and in reports, and you can change it later.
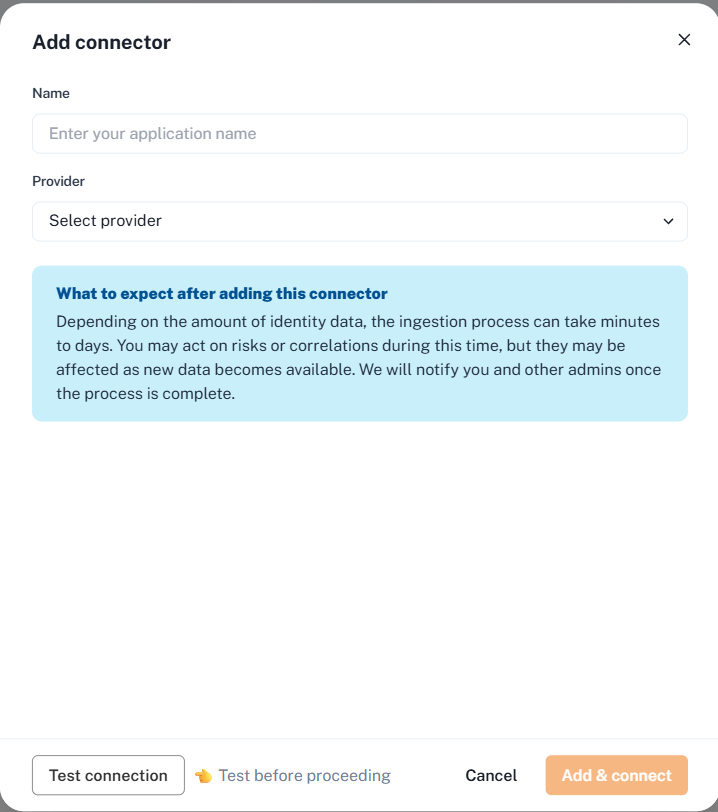
Open Provider and select ServiceNow CMDB.
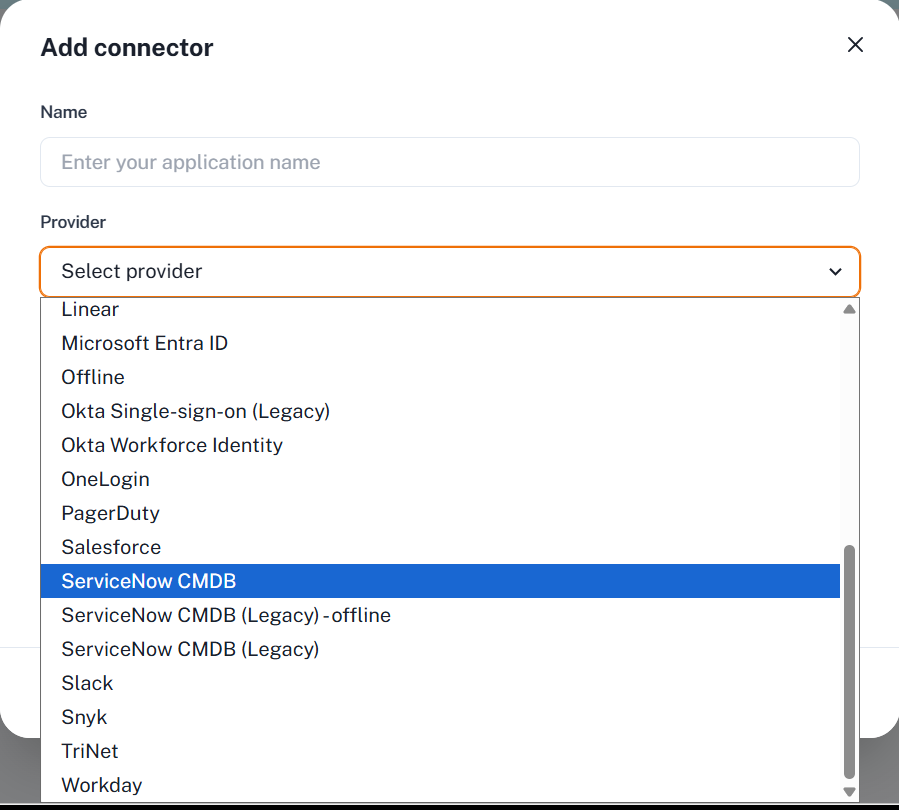
The provider list contains three ServiceNow entries:
| Entry | Use it? |
|---|---|
| ServiceNow CMDB | Yes — this guide |
| ServiceNow CMDB (Legacy) - offline | No. For offline file imports |
| ServiceNow CMDB (Legacy) | No. An earlier connector, kept for existing setups |
Choosing a Legacy entry gives you a different form and a different set of fields.
Step 4 — Enter the instance URL
Enter your ServiceNow instance URL.
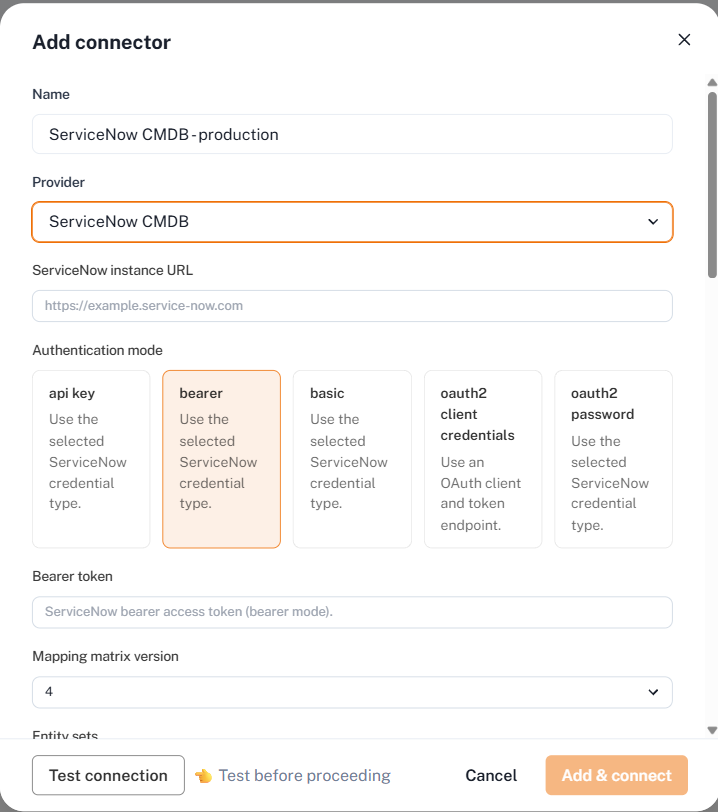
Rules for this field:
| Rule | Example |
|---|---|
| Must be HTTPS | https://acme.service-now.com |
Must be a service-now.com address | https://acme.service-now.com |
| No username or password in the URL | Not https://user:pass@acme.service-now.com |
| No path or query string | Not https://acme.service-now.com/nav_to.do |
No #fragment, no IP address, no port other than 443 | Not https://10.0.0.1:8443/#x |
Step 5 — Choose an authentication method
Select one of the five Authentication mode cards, then fill in only that method's fields.
| Mode | What you enter |
|---|---|
| api key | The API key |
| bearer | A bearer access token |
| basic | Username and password |
| oauth2 client credentials | Client ID and client secret |
| oauth2 password | Client ID, client secret, username and password |
Enter credentials for the mode you selected and leave the others empty. Mesh rejects a configuration that carries credentials for more than one method.
For either OAuth mode, OAuth token URL is optional. Leave it empty and Mesh uses your instance's standard token endpoint.
Step 6 — Choose what to collect
Leave Mapping matrix version at the value already selected. This field is required, and the pre-selected value is the right one.
Entity sets lists everything the connector can read. All are selected by default.
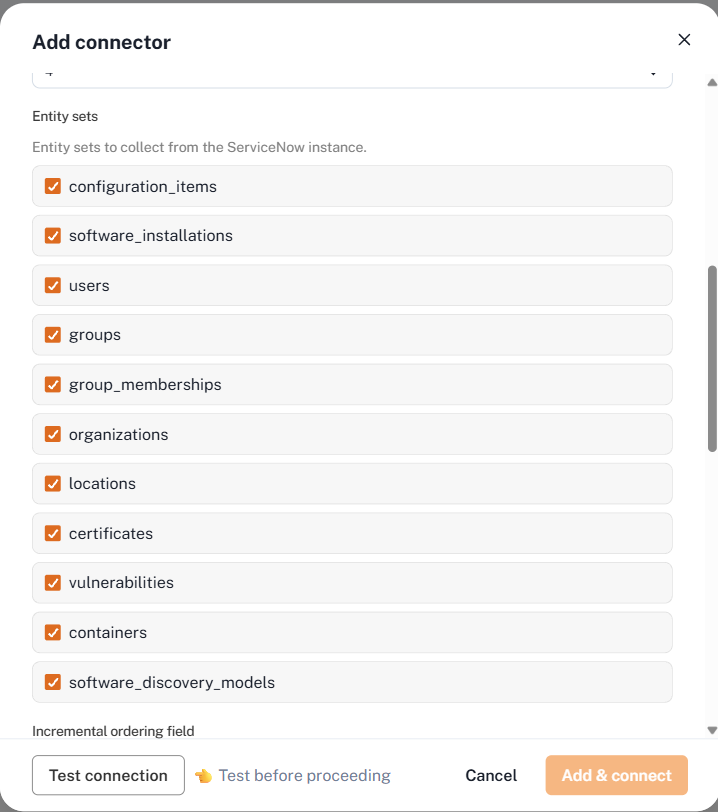
Listed in the order the form shows them:
| Entity set | Reads | Becomes |
|---|---|---|
configuration_items | Computers | Machine assets |
software_installations | Installed software | Software assets |
users | People | User accounts |
groups | Groups | Groups |
group_memberships | Who is in which group | Group membership |
organizations | Departments | Organization context |
locations | Locations | Location records |
certificates | Certificates | Certificate records |
vulnerabilities | Known vulnerabilities | Inventory records |
containers | Containers | Software assets |
software_discovery_models | Software models | Software assets |
Clear anything you do not want Mesh to read.
Anything Mesh builds from a set — correlations, risk scores, dashboards — is incomplete without it. Clear a set only when you have a reason.
Step 7 — Advanced options
These are optional. Skip this step unless you need it.
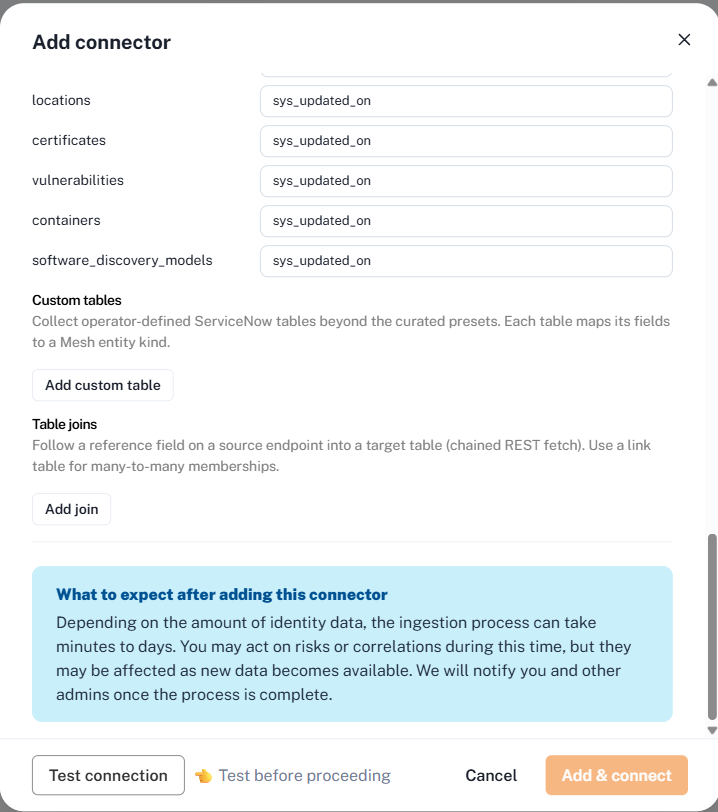
| Option | What it does | When you need it |
|---|---|---|
| Incremental ordering field | The field Mesh uses to find what changed. Defaults to sys_updated_on for every set | Only if your instance tracks changes on a different field |
| Custom tables | Collect a ServiceNow table Mesh does not read by default | You keep asset data in a custom table |
| Table joins | Follow a reference field into another table to pull extra detail | A field you need lives on a related record |
Ask Axiad before using custom tables or joins — the right settings depend on how your CMDB is structured.
Step 8 — Test the connection
Select Test connection.
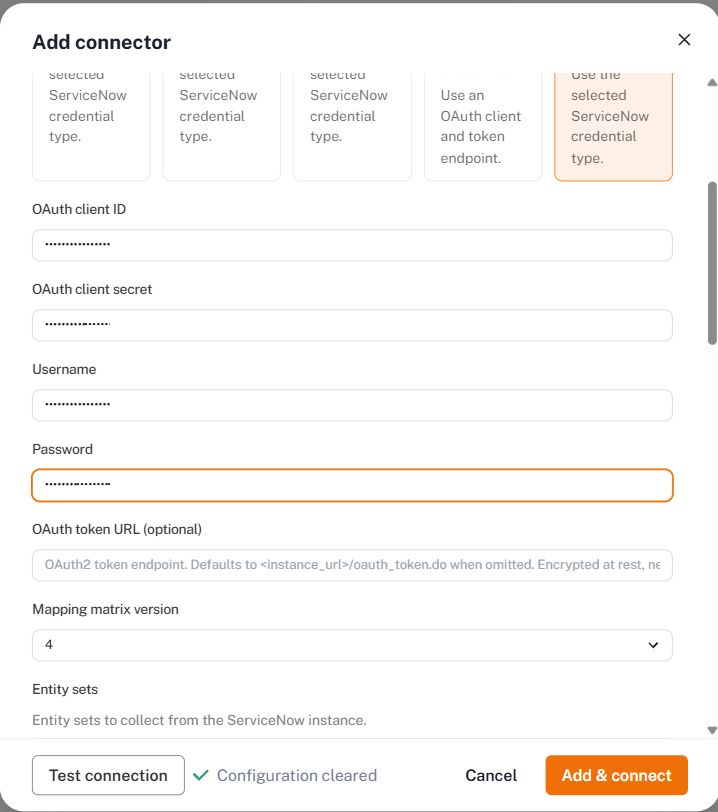
A green checkmark and Configuration cleared mean Mesh reached your instance and the credential was accepted. Add & connect becomes available.
If the test does not pass, see Troubleshooting.
Step 9 — Add the connector
Select Add & connect.
Your connector appears in the list, and the first collection starts.
Mesh reads your whole CMDB the first time. On a large estate this can take hours. You can use Mesh during this time, though data will be incomplete until it finishes. To see when it finishes, watch the Health column on Settings → Connectors.
Check that it worked
- Open Settings → Connectors and find your connector.
- Check the Health column.
- For run-by-run detail, open Settings → Data source syncs. See Data source synchronizations.