Set up Okta for Axiad Mesh
Integrate Okta as a connector in Axiad Mesh to collect the identity data Mesh needs to map your environment and find correlations, risks, and gaps across your population.
The integration requires configuration on both sides: first in Okta, then in Axiad Mesh. For an overview of what the connector collects, see the Okta connector reference.
This guide covers collecting identity data from Okta. To let your users sign in to the Mesh portal with Okta, see Okta identity provider integration instead. The two integrations are independent, and Axiad recommends a separate Okta application for each so that permissions stay scoped to their purpose.
What the connector accesses
The connector is read-only. Every request it makes is an HTTP GET; it never
creates, modifies, or deletes anything in your Okta org.
It reads these seven endpoints:
| Okta endpoint | What it populates in Mesh | Required scope |
|---|---|---|
/api/v1/users | User accounts and profiles | okta.users.read |
/api/v1/users/{id}/authenticator-enrollments | Enrolled MFA authenticators | okta.users.read |
/api/v1/groups | Groups | okta.groups.read |
/api/v1/groups/{id}/users | Group membership | okta.groups.read |
/api/v1/apps | Applications | okta.apps.read |
/api/v1/apps/{id}/users | Application assignments | okta.apps.read |
/api/v1/logs | Sign-in events | okta.logs.read |
That resolves to four read scopes in total: okta.users.read,
okta.groups.read, okta.apps.read, and okta.logs.read.
These are the seven distinct Okta API paths the connector calls. When you add the connector, Mesh lists seventeen named endpoints across them — several read the same path with a different query. The scopes are the same either way. See Step 3.
Equally important is what the connector does not need. It reads no devices,
no OAuth consent grants, no admin-role assignments, and no org settings, so
scopes such as okta.devices.read, okta.appGrants.read, okta.roles.read,
and okta.orgs.read are not required.
Scopes are granted on an OAuth service app. An API token has no scope list at all — its access comes from the admin role of the account that created it. If you use an API token, skip the scope grants and make sure that account holds the Read-only Administrator role instead.
Okta has no field-selection parameter, so /api/v1/users returns the full user
profile object on every call. The table above describes what Mesh maps and
stores, not a narrower set that Okta sends. Mesh discards the fields it does
not map.
Okta configuration steps
These steps are Axiad's current understanding of the configuration. Because Okta is a third-party product, there may be slight variations between your experience and what this guide describes. We work hard to keep things as up to date as possible, but depending on the versions in use and the latest Okta updates, there may be some mismatches.
If you find any blatant differences or anything that doesn't make sense, contact Axiad support with feedback on this article.
Choose an authentication method
The connector supports two ways to authenticate, and the choice determines how precisely you can limit its access.
| Method | How access is limited | Axiad's advice |
|---|---|---|
| OAuth service app | The four scopes above. Anything outside them is refused. | Recommended by Axiad. The only option that achieves genuine least privilege while keeping every capability. Mesh does not pick one for you — both are supported. |
| API token | Only by the admin role of the account that created it. A token carries no scope list. | Use when a service app is not an option. Requires the Read-only Administrator role. |
Mesh names these methods after the protocol they use, so the labels differ from the ones above. They are the same two things:
| In this guide | In Mesh |
|---|---|
| OAuth service app | Private Key JWT |
| API token | Bearer — despite the name, Mesh sends the token as Authorization: SSWS, which is the scheme Okta's Management API requires |
Option A: OAuth service app
This option grants exactly the four scopes the connector calls and nothing else.
-
Sign in to the Okta Admin Console and go to Applications > Applications.

-
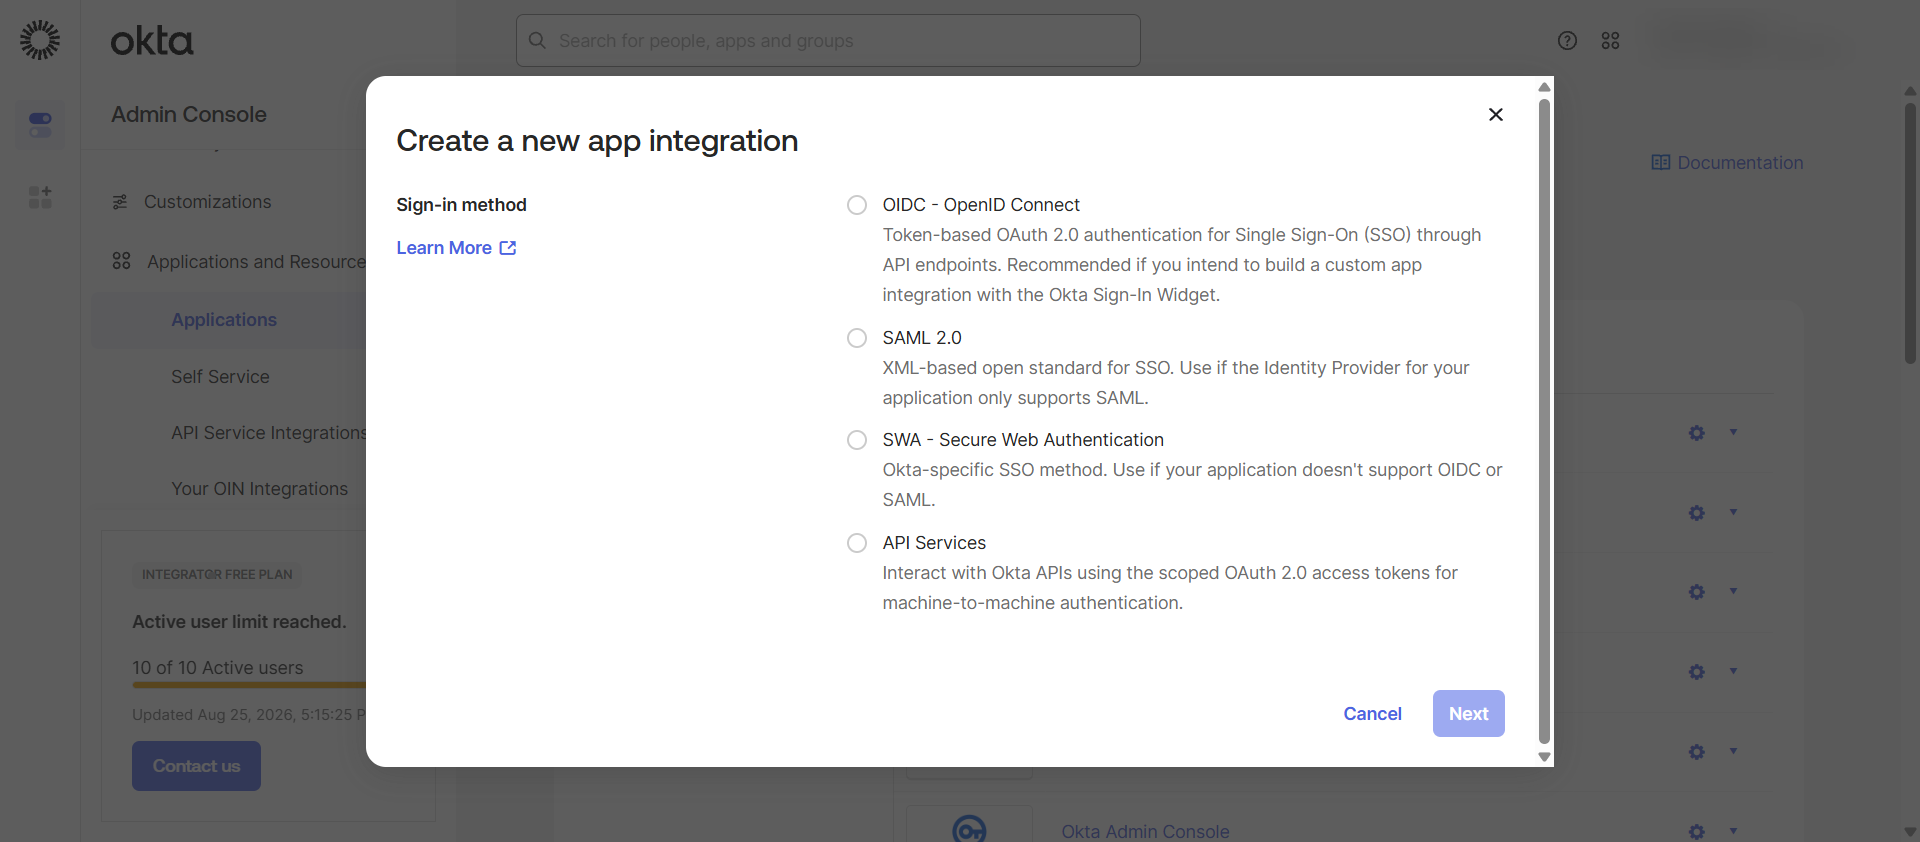
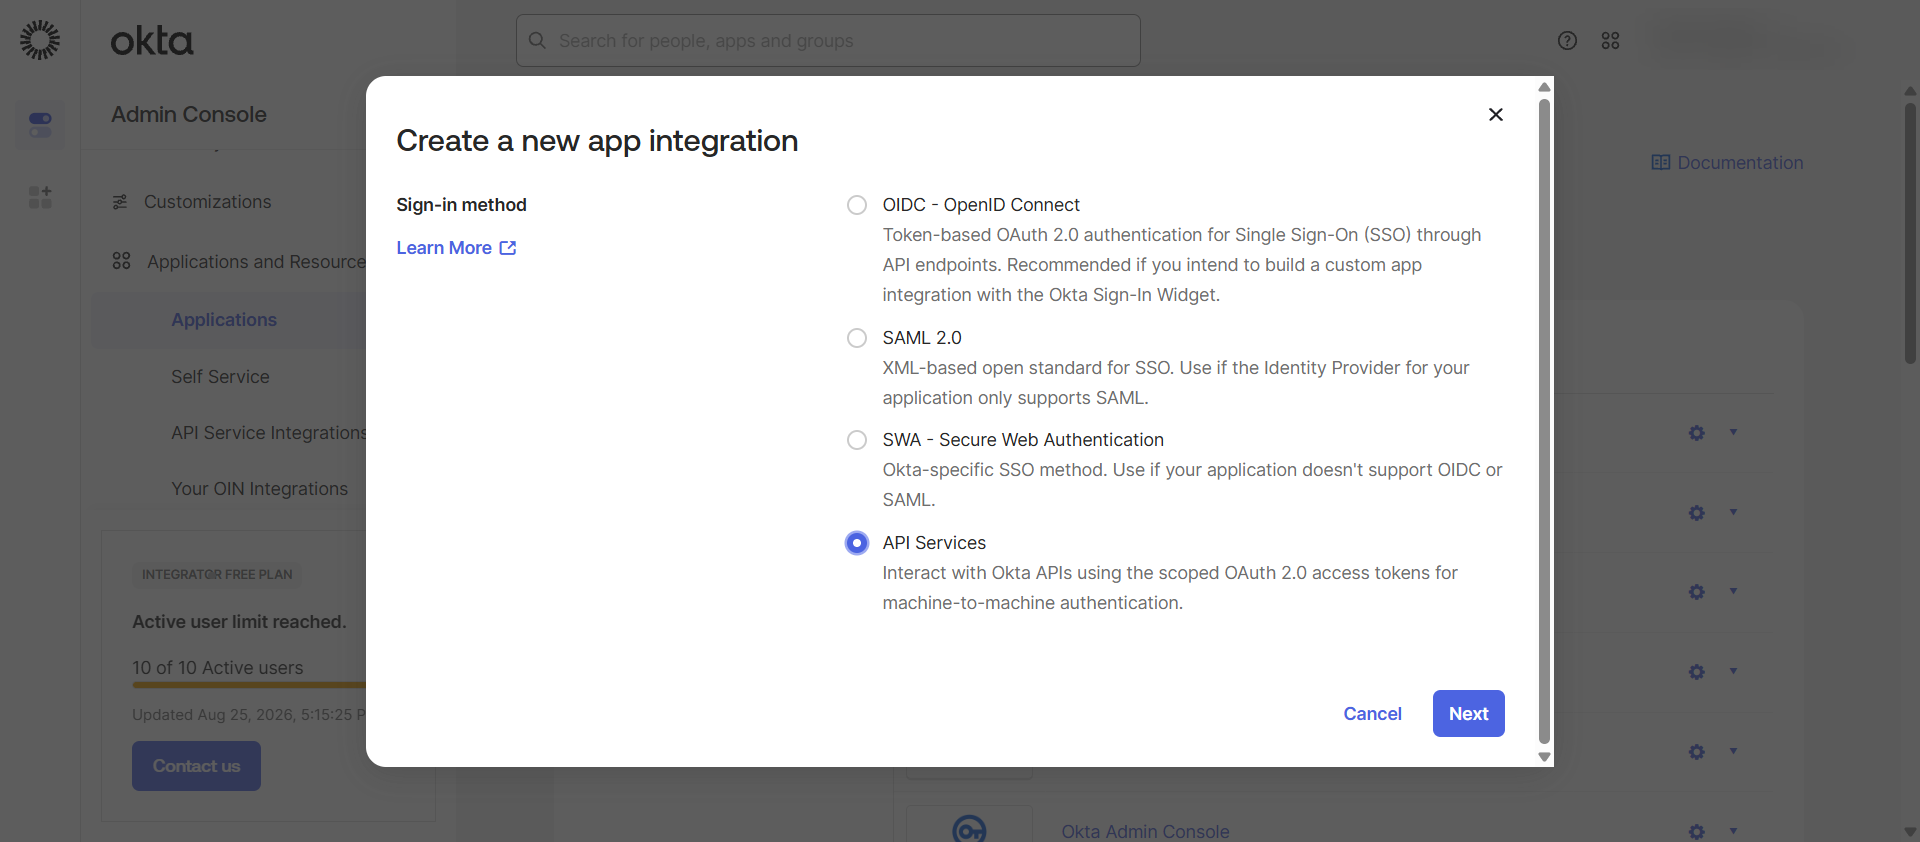
Select Create App Integration, choose API Services, and then select Next.
-
Give the integration a name that identifies its purpose, for example Axiad Mesh connector, and then select Save.
-
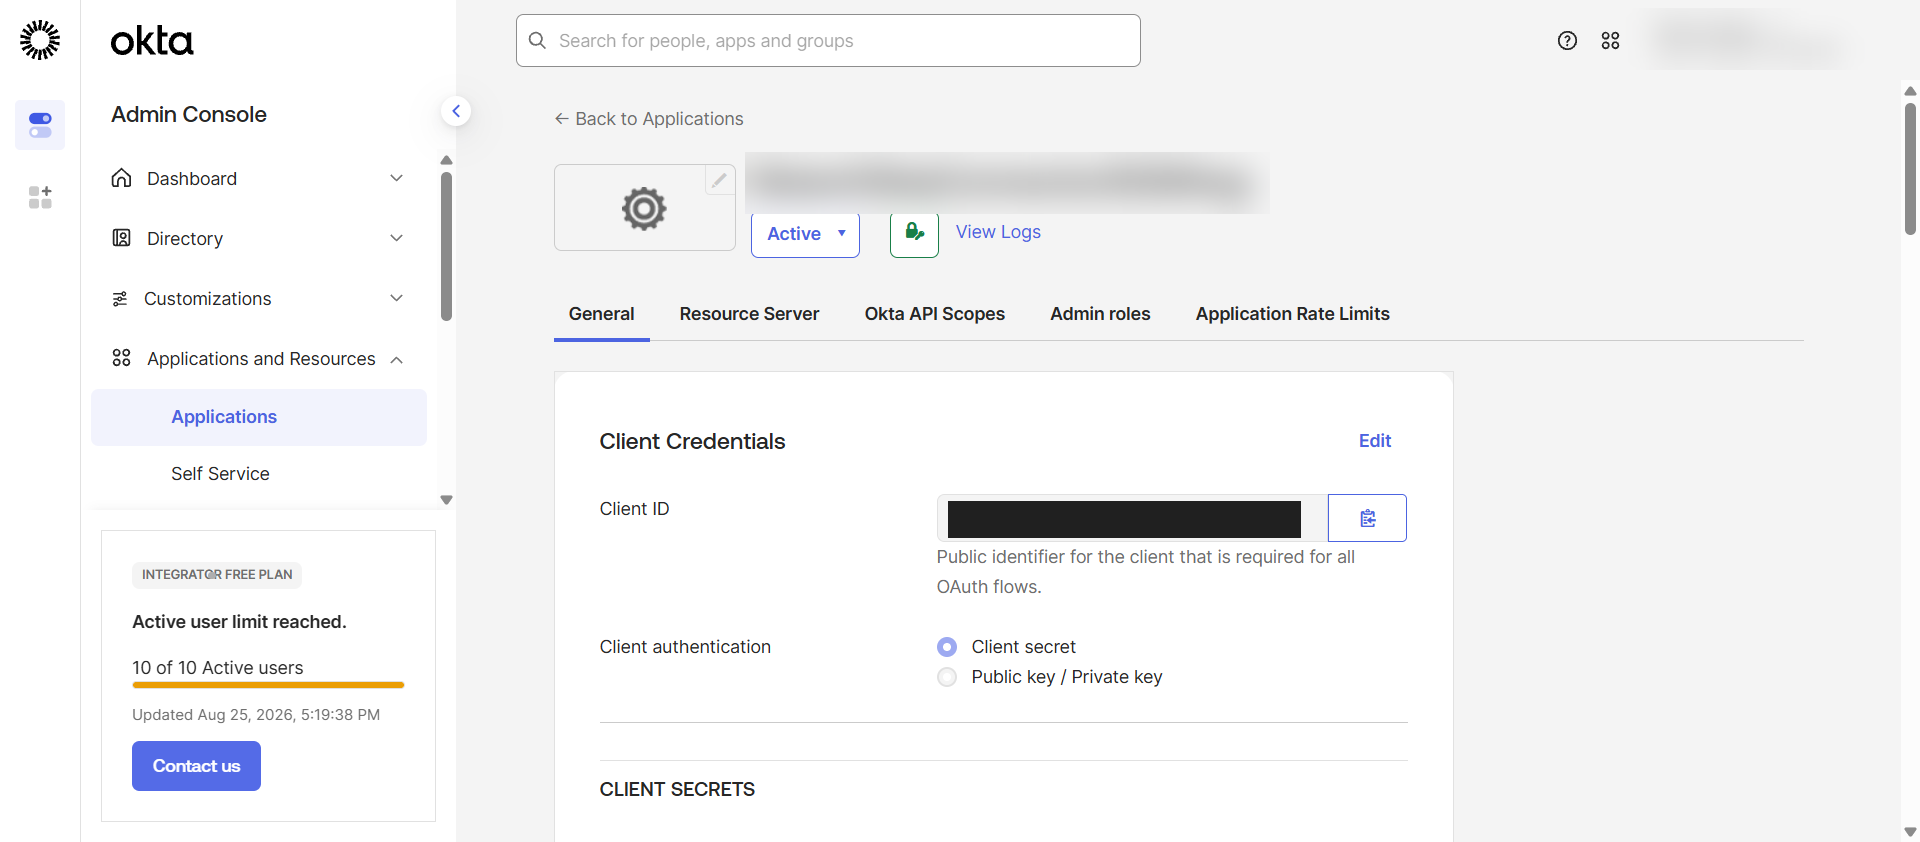
On the General tab, under Client Credentials, set the Client authentication method to Public key / Private key.
-
Add a key pair and save the private key. Keep it somewhere safe; Okta shows the private key only once.
- The key must be RSA of at least 2048 bits, or an EC key on the P-256, P-384, or P-521 curve.
- Supported signing algorithms are
RS256,RS384,RS512,ES256,ES384, andES512. - Both PKCS#8 and legacy PKCS#1 or SEC1 PEM formats are accepted.
-
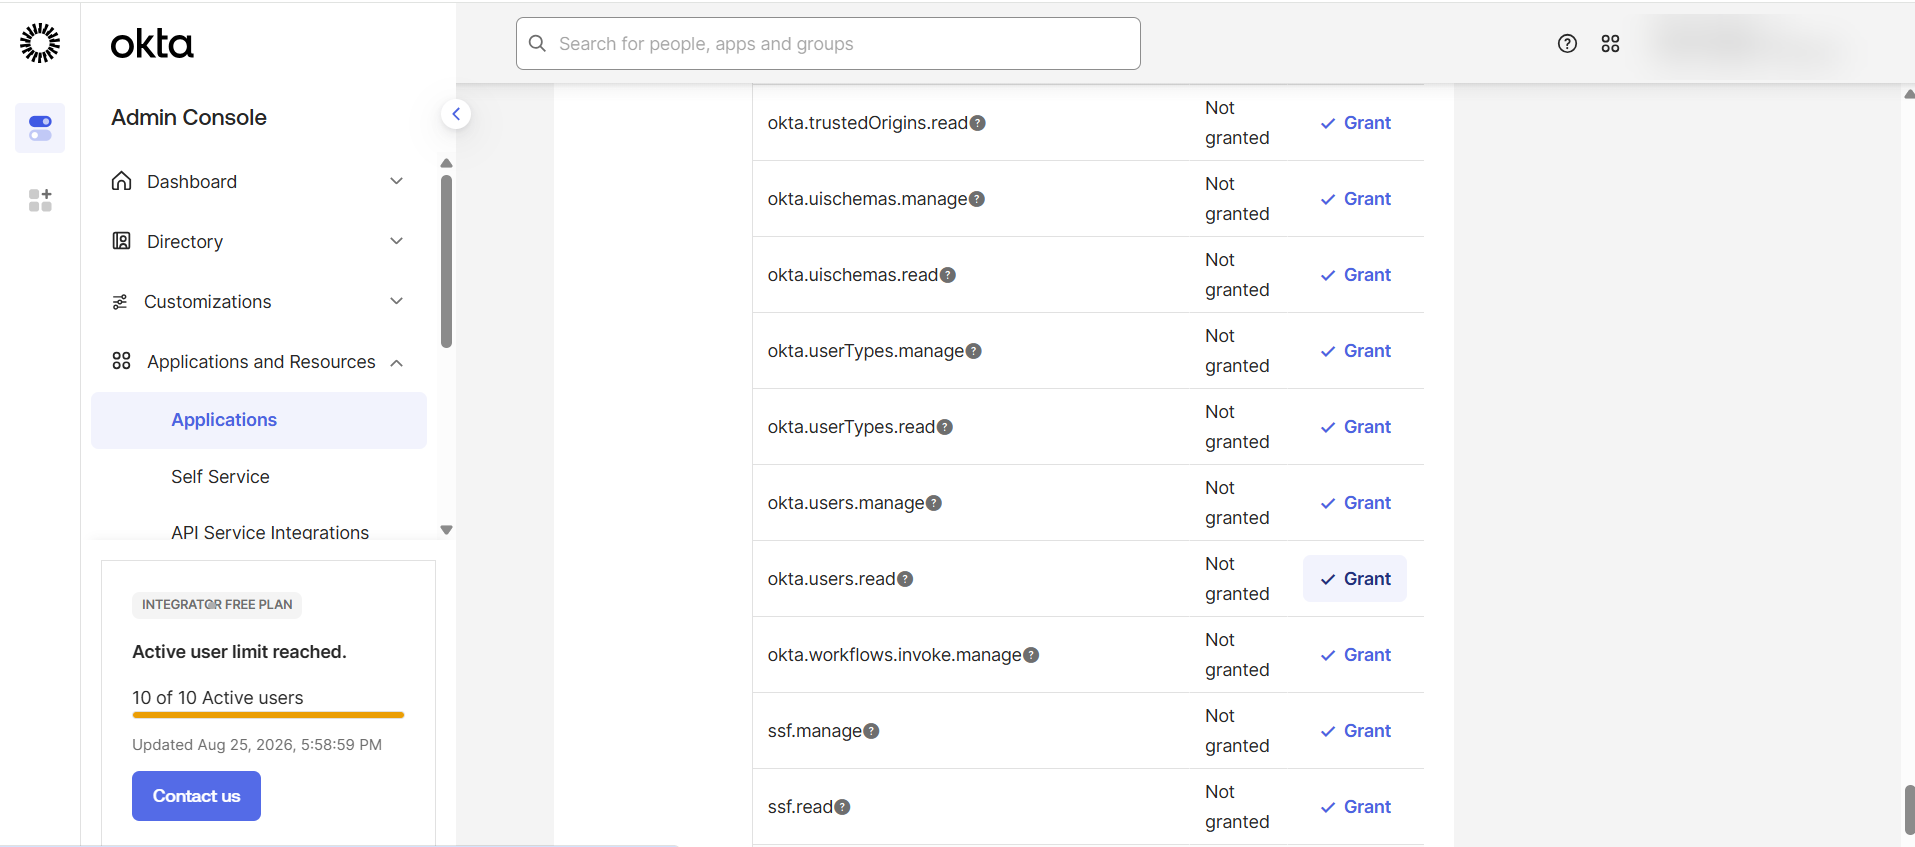
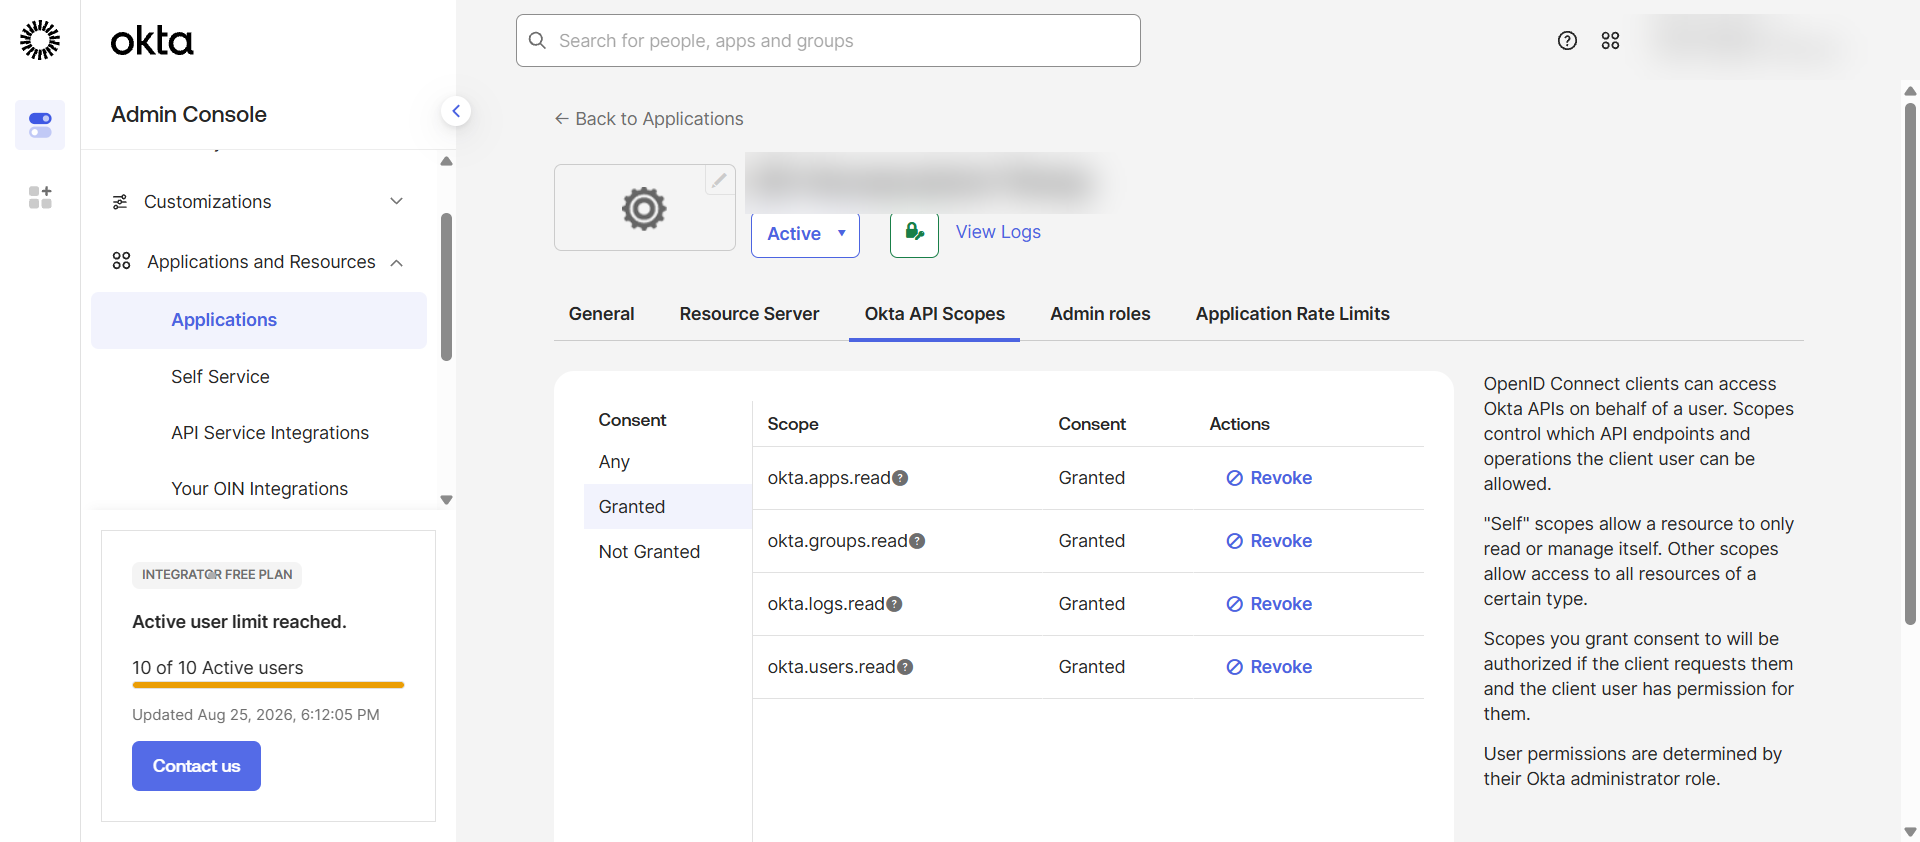
On the Okta API Scopes tab, grant these four scopes and no others:
okta.users.readokta.groups.readokta.apps.readokta.logs.read
-
Copy the Client ID from the General tab.
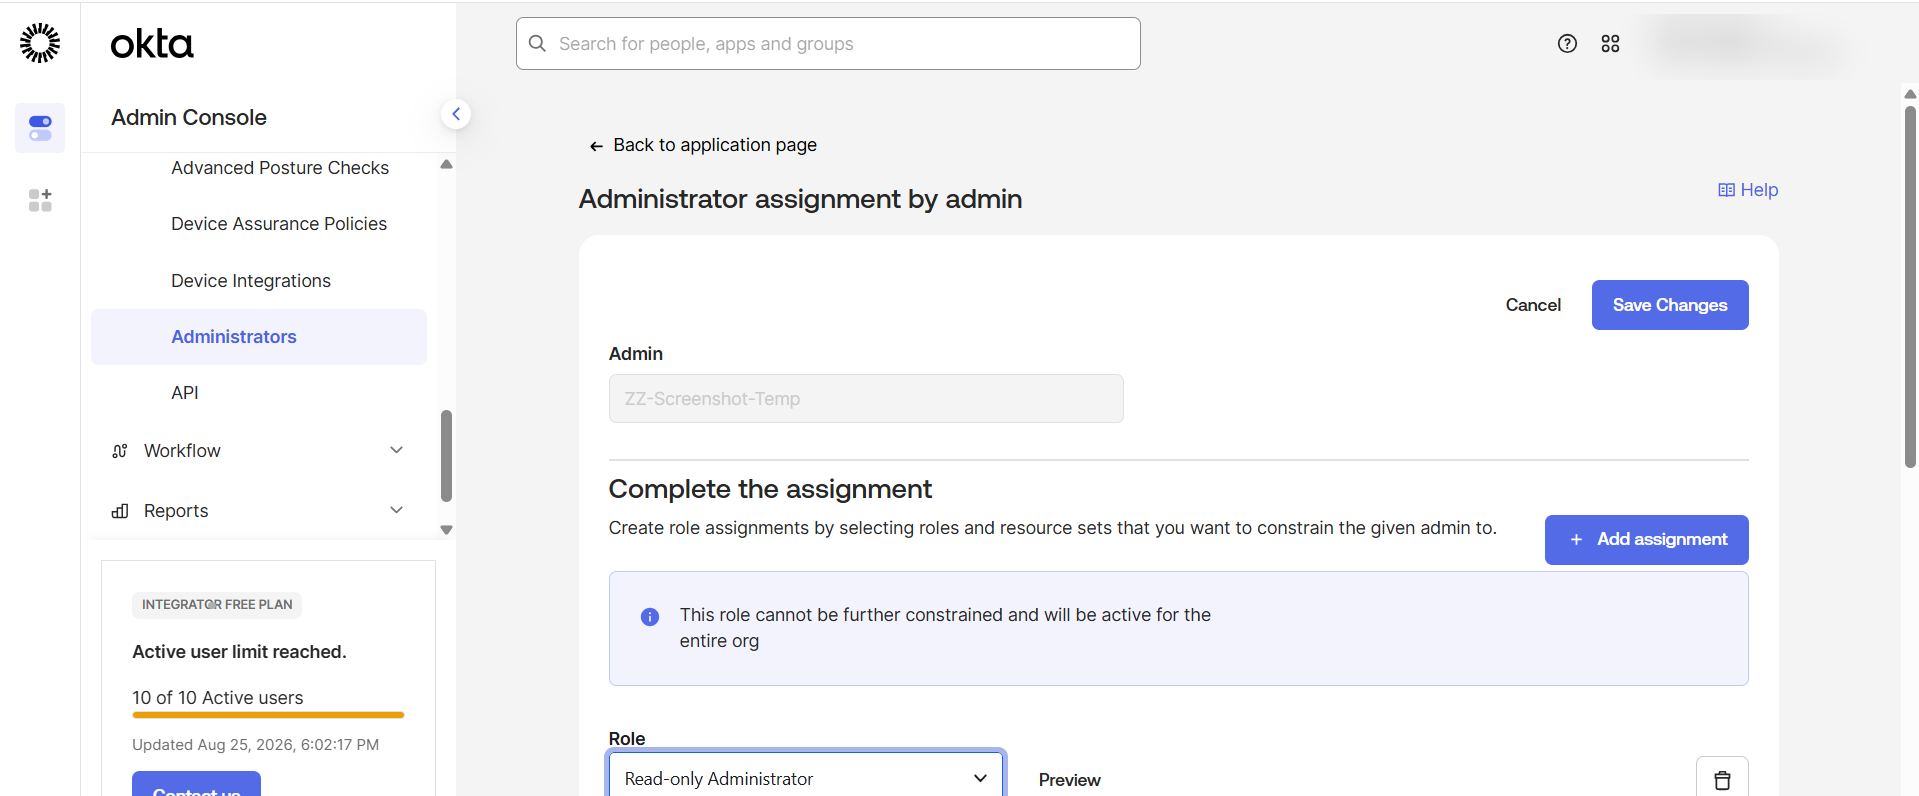
An Okta service app also needs an admin role assigned to it. With the correct
scopes but no admin role, Okta does not return an error. It returns 200 OK with
fewer records than exist, so a collection looks successful while silently
missing data.
On the Admin roles tab, assign the Read-only Administrator role to the service app.
Option B: Service account and API token
An Okta API token inherits the permissions of the account that created it, and those permissions change whenever the account's do. A token created by a Super Admin can do anything a Super Admin can, regardless of what the connector actually needs. So create a dedicated account rather than using a person's.
-
In the Okta Admin Console, create a user to act as a service account, for example
axiad-mesh-connector. -
Assign that user the Read-only Administrator role.
-
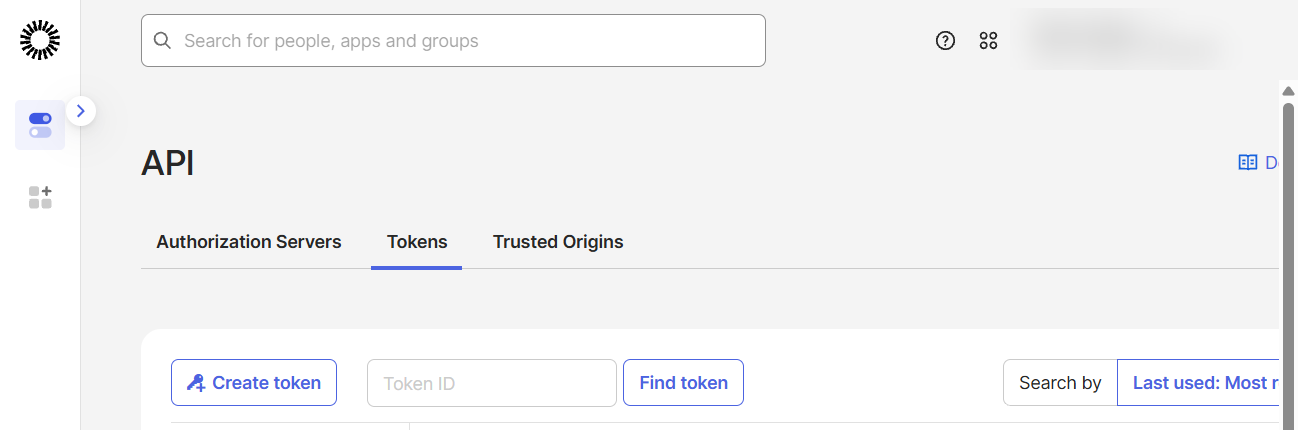
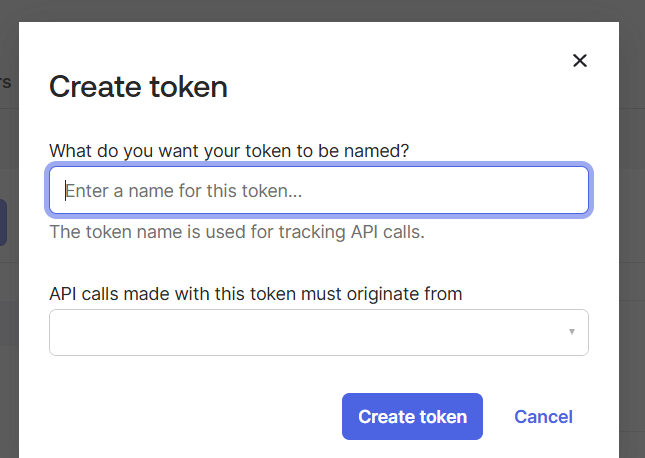
Sign in as the service account, then go to Security > API > Tokens and select Create Token.
-
Copy the token value. Okta shows it only once.
A custom admin role cannot read the Okta System Log. Per Okta, custom admin roles are currently unable to view org system logs, and there is no System Log permission in the custom-role catalog.
If you assign a custom role, every other endpoint works but sign-in events
stop arriving, because /api/v1/logs is unreadable. Among the standard roles,
Read-only Administrator can read the System Log. Report Administrator cannot,
despite the name.
If you build a custom role anyway, Okta requires you to bind each permission to
a resource set. Binding okta.groups.read or okta.apps.read to a subset rather
than All groups or All apps makes Okta return 200 OK with fewer
records, not 403.
Mesh cannot distinguish that from a genuinely smaller org, so it may treat identities it can no longer see as having gone away. A restriction that under-returns is considerably more dangerous than one that fails outright. Keep resource sets at All.
Optional: Restrict the token to specific IP addresses
When you create an API token, Okta offers to limit where calls made with that token may originate from. If you use it, you must allowlist the addresses Mesh calls from.
-
Contact Axiad support for the current Mesh egress IP addresses for your region.
-
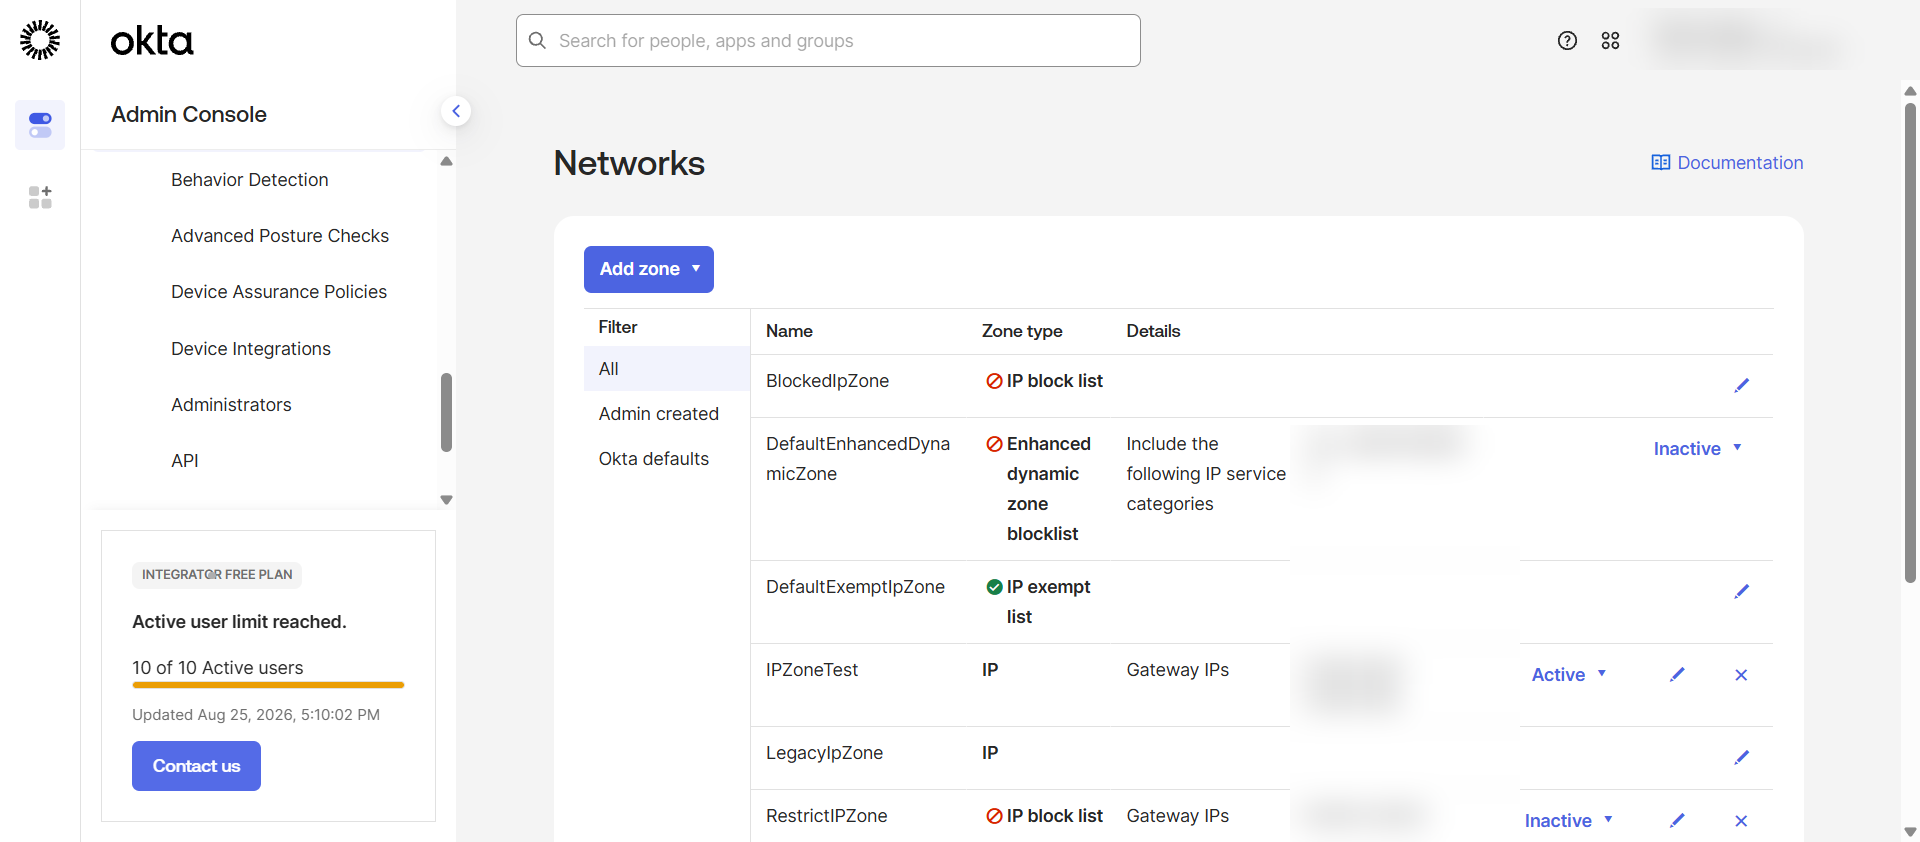
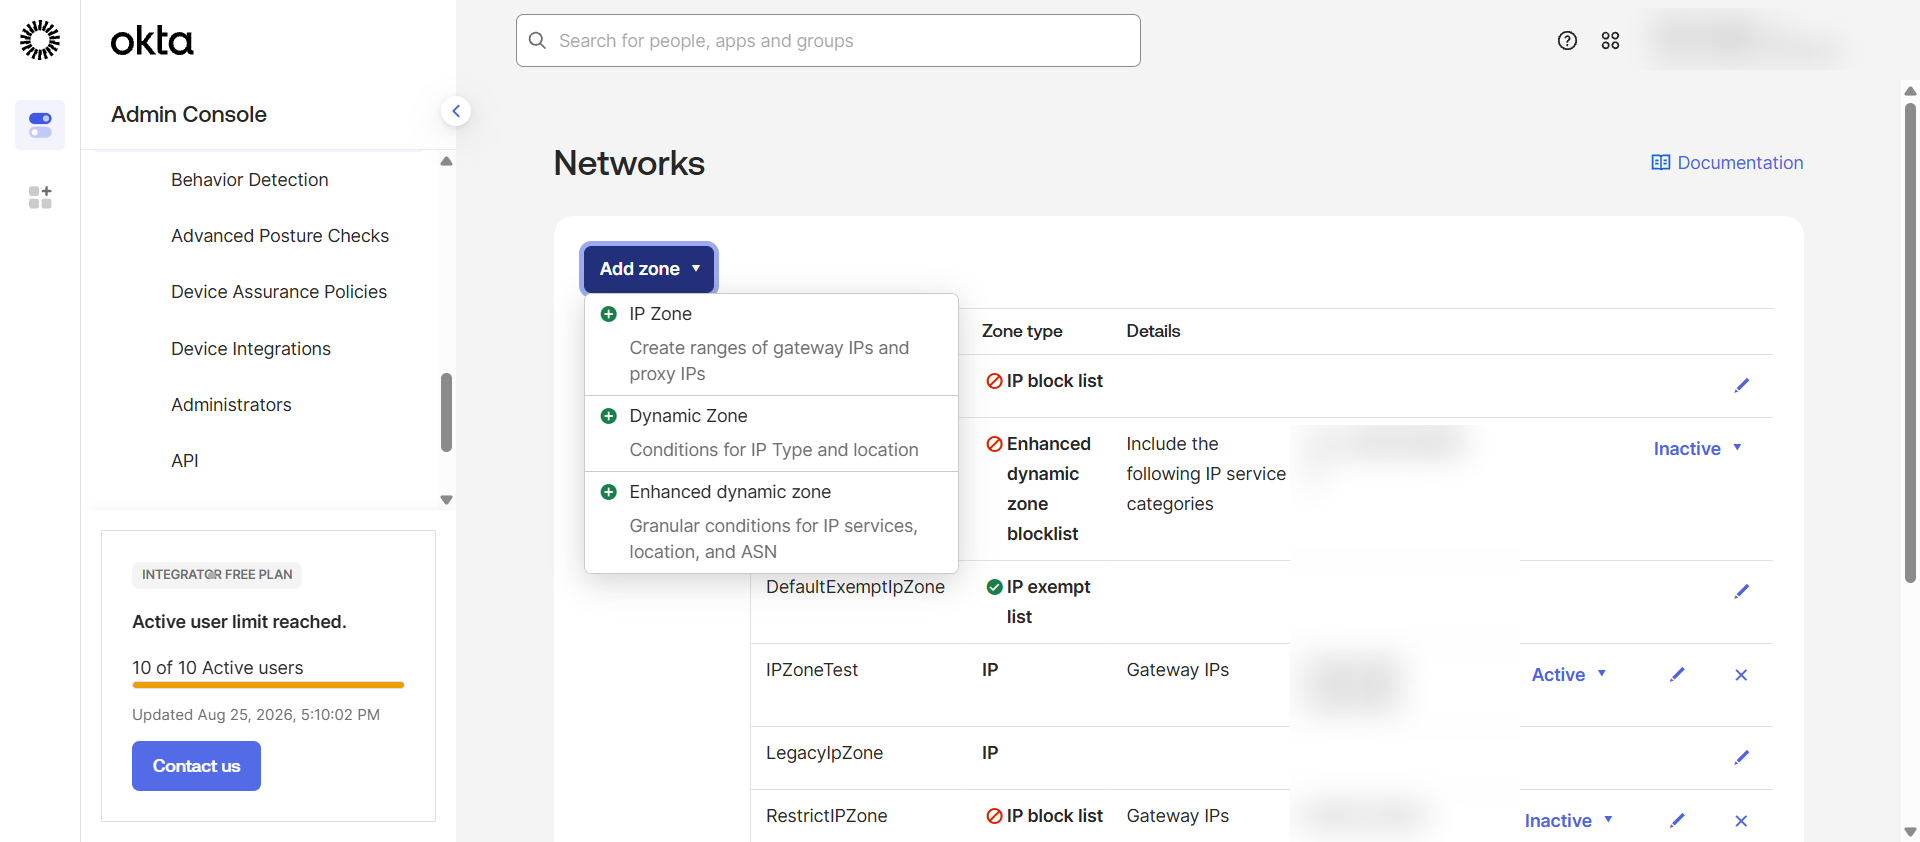
In the Okta Admin Console, go to Security > Networks, select Add zone, and choose IP Zone.
-
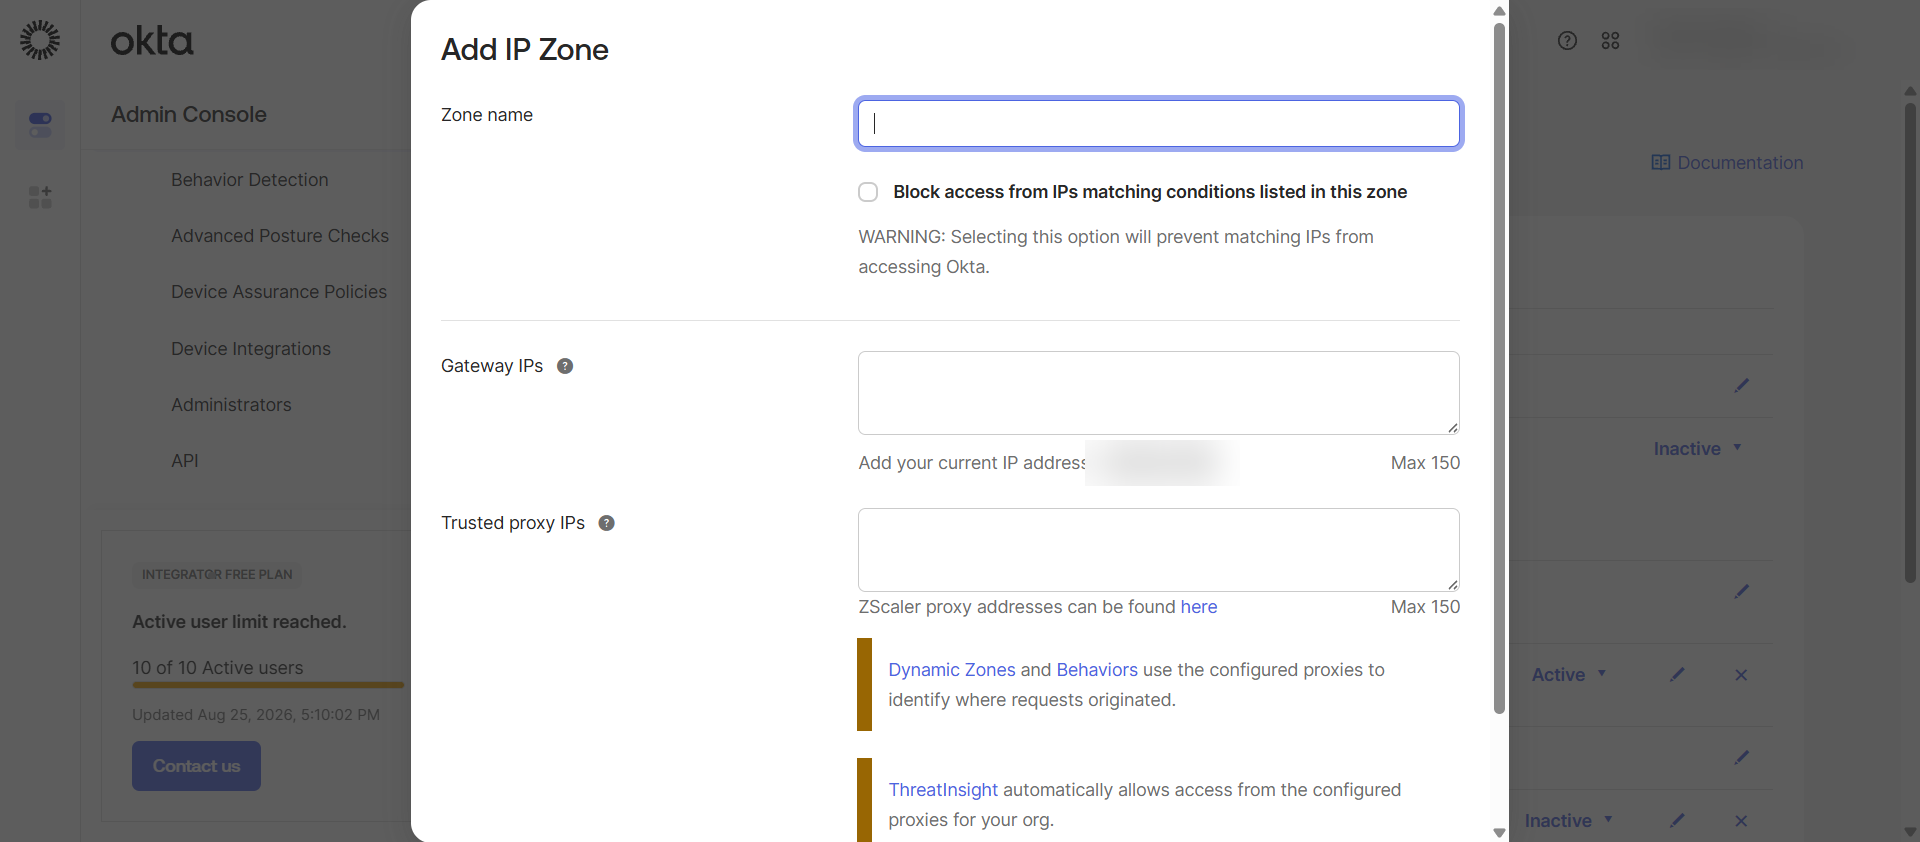
Give the zone a name, enter the Mesh egress addresses under Gateway IPs, and save it.
-
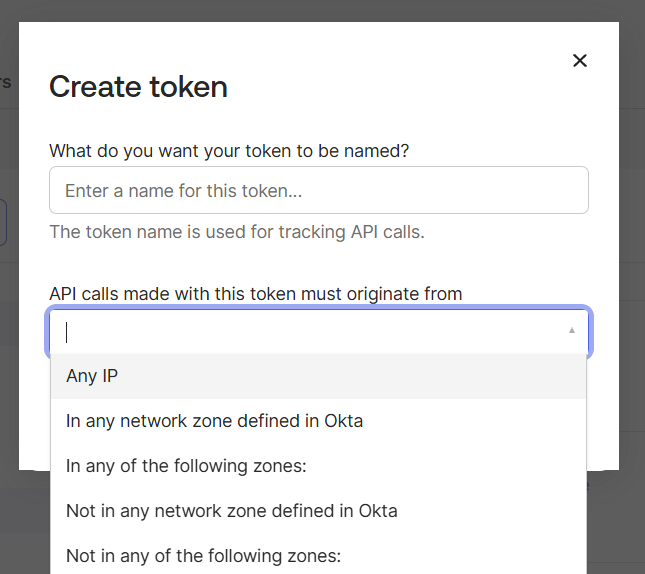
When you create the API token, set API calls made with this token must originate from to that zone instead of Any IP.
Okta enforces this restriction using the source address of the connection. Nothing in the request declares an address, so if Mesh's egress addresses change and the zone is not updated, every call is refused and collection stops. Coordinate with Axiad support before relying on an IP-restricted token.
The connector does not support DPoP-bound access tokens. Use one of the two authentication methods above.