Workday setup
Connect Workday to Axiad Mesh to bring in the user data needed to fill out your environment and let Axiad find correlations, risks, and gaps in your population.
Workday connects through the unified HRIS connector. This page covers the Workday-side configuration you complete first — an Integration Systems User, an API client, and a refresh token. Once that's done, you add the connector in Mesh by following Connect your HR system.
Workday configuration steps
These steps reflect Axiad's current understanding of the configuration. Because Workday is a third-party product, there may be slight variations between your experience and what this guide describes. We work hard to keep things as up to date as possible, but depending on the versions in use and the latest updates, there may be some mismatches.
If you find any significant differences or anything that doesn't make sense, let us know through Axiad support.
To configure Workday for API access, complete the following steps. You can then connect Workday in Mesh.
Create an Integration Systems User and security group
-
In Workday, create an Integration Systems User (ISU) and set up its credentials.
-
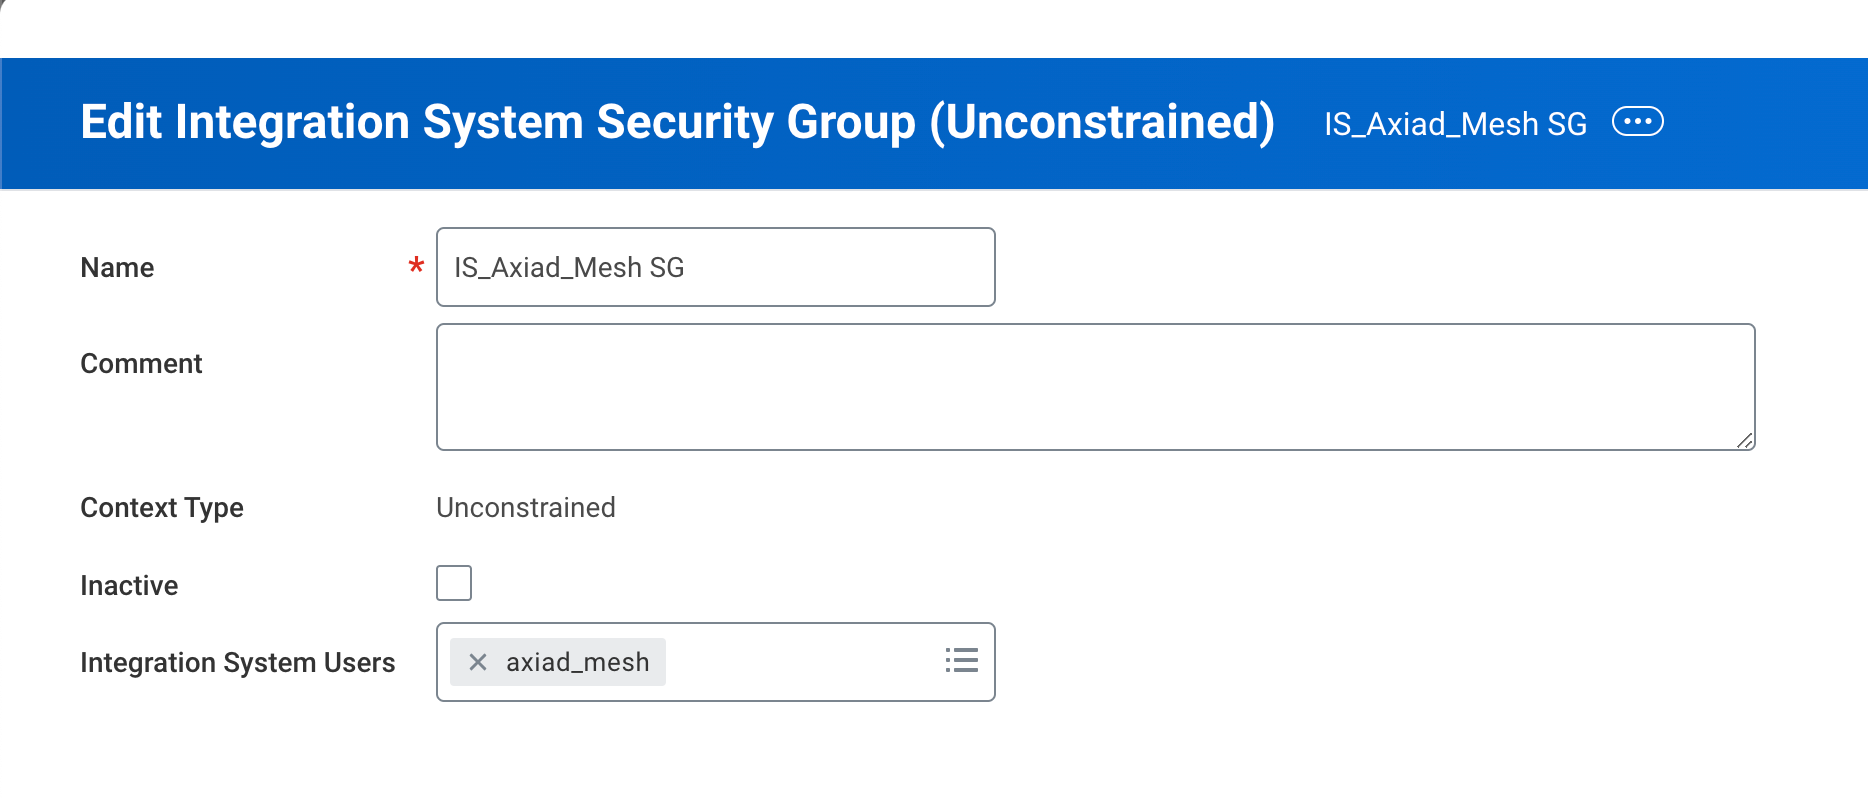
Create an Integration Systems Security Group (Unconstrained).
-
Bind the newly created ISU to the new security group.
-
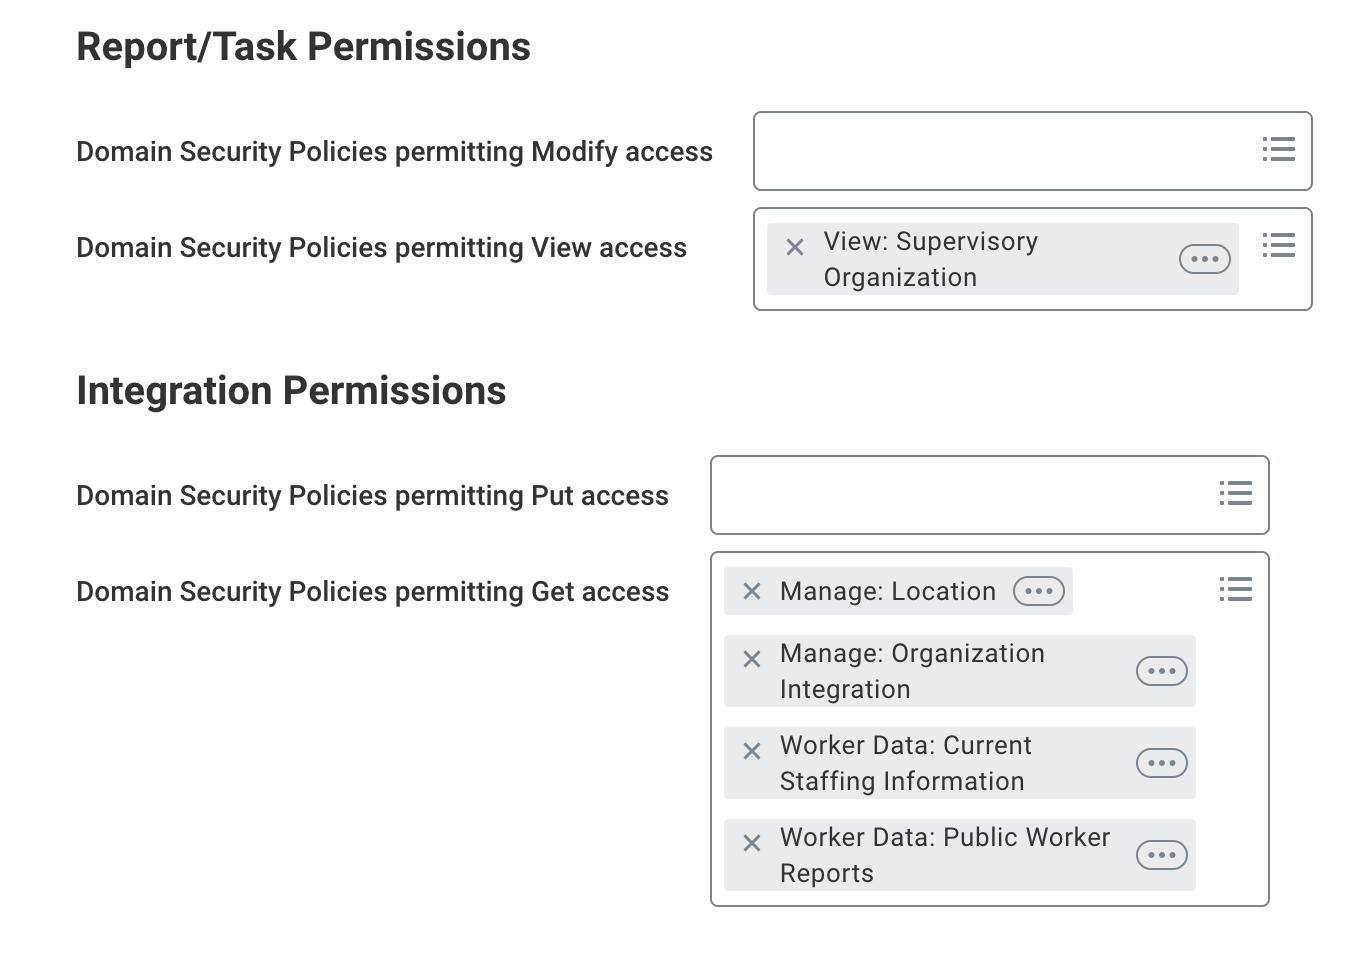
Add Domain Security Policies to the Integration Systems Security Group as follows:
- Under Domain Security Policies permitting View access, add View: Supervisory Organization.
- Under Domain Security Policies permitting Get access, add:
- Manage: Location
- Manage: Organization Integration
- Worker Data: Current Staffing Information
- Worker Data: Public Worker Reports
Create an API client
-
In Workday, locate the Register API Client for Integration task.
ImportantBe sure to select Register API Client for Integration rather than just Register API Client. Axiad Mesh requires the former because it uses the OAuth 2.0 Client Credentials grant flow.
-
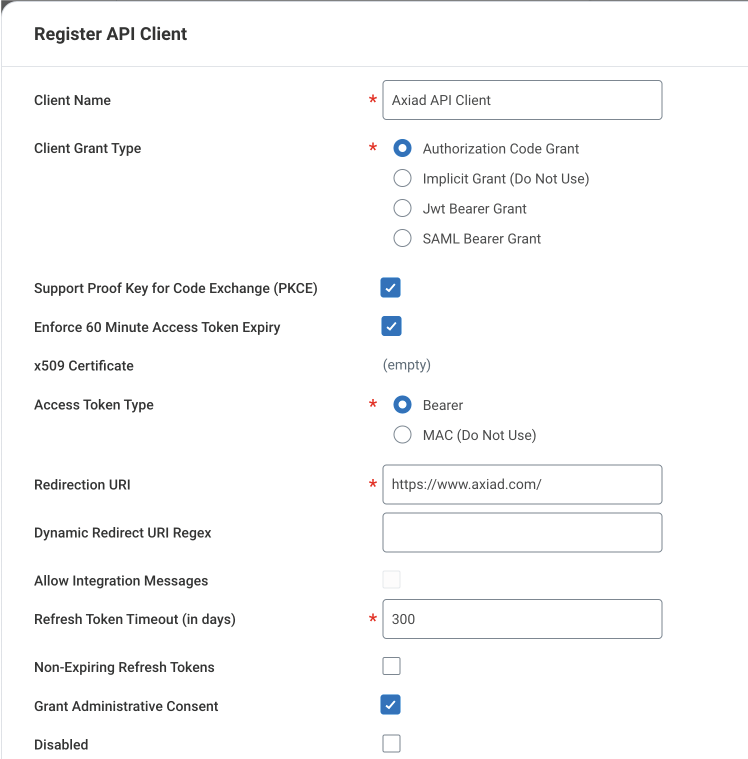
Set the Client Name to a friendly name that's meaningful to the integration.
-
Set the Client Grant Type to Authorization Code Grant.
-
Check the Support Proof Key for Code Exchange (PKCE) option.
-
Set the Access Token Type to Bearer.
-
Set the Redirect URI to a syntactically valid URL. The integration doesn't use this value, but the client configuration requires one.
-
Set the Refresh Token Timeout to your preferred number of days.
-
Check the Grant Administrative Consent option.
-
Select the scopes that this API client can access. The required scopes are:
- Organization and Roles
- System
-
Check the Include Workday Owned Scope option.
-
Complete the creation, then copy the Client ID and Client Secret values. You need them for the Axiad Mesh configuration steps.
Generate a refresh token for the API client
-
In Workday, locate the View API Clients report.
-
In the API Clients for Integrations tab, locate your newly created API client.
-
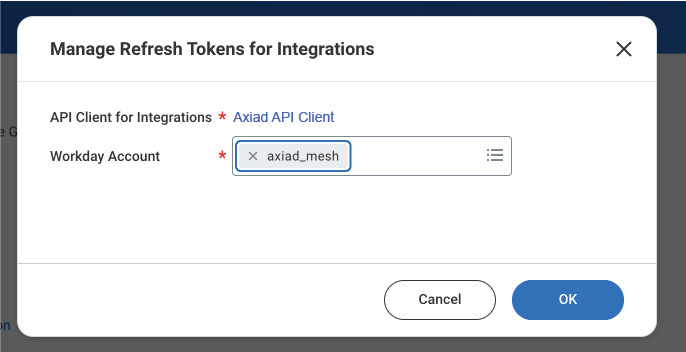
Click the three-dot menu button next to the client's name, hover over API Client, and then click Manage Refresh Tokens for Integrations.
-
In the Workday Account field, add the ISU account that you created in Create an Integration Systems User and security group.
-
Click OK to generate the refresh token.
-
Copy the refresh token — you'll supply it when you connect Workday in Mesh.
Add it in Mesh
With the Workday-side configuration complete, add the connector in Mesh. Workday connects through the unified HRIS connector — there is no separate Workday connector to configure.
Follow Connect your HR system, and select Workday as your provider when the connection window asks. You'll supply the API client credentials and refresh token from the steps above during that provider authorization step.